Rustic Garden Hand Tool Organizer With Planter
Today I'm sharing a handy way to corral your small garden tools in one place. Its wall mount style is perfect to hang in a garden shed or on a potting bench. The inspiration for my rustic garden hand tool organizer came from an adorable garden tools key rack at Goodwill.
It reminded me of how I was constantly looking for my favorite garden trowel last summer. I figured if it's used to keep keys organized, why not small garden tools! So I gathered some scrap wood and a few other things in my stash and I'll show you how easy it is to make.
Upcycled Garden Tools Key Rack Holder
I'll also be sharing how to create the look of galvanized metal with paint. This way all the metal pieces on the garden tool hanger will be unified.
Plus my recipe for aging new wood with stuff from the kitchen AND how to transfer graphics onto wood with glossy paper.
These are the supplies I gathered to make the wall mount wooden garden tool rack. There's that garden tool key holder and what it looked like before.
Before we get into the nitty-gritty of how to make the small garden tool holder, almost all of the DIY projects shared here at Interior Frugalista have step-by-step tutorials so why not get your budget DIY on and subscribe. You can also follow us on Pinterest, Facebook, Instagram, and YouTube.
This post contains affiliate links so you can see what products I used or recommend for this project. As an Amazon Associate, I earn a small commission from qualifying purchases at no extra cost to you.
Here's How I Made It
We'll start with how to make the scrap wood sign along with how to magically age the wood.
Scrap Wood Garden Tool Holder Assembly
To make the rustic wood garden tool holder you'll need some scrap wood. I salvaged two pieces of battered pallet wood and joined them together with pocket holes every 12-inches using a Kreg Pocket Hole Jig as pictured below.
Recipe For Aging Wood
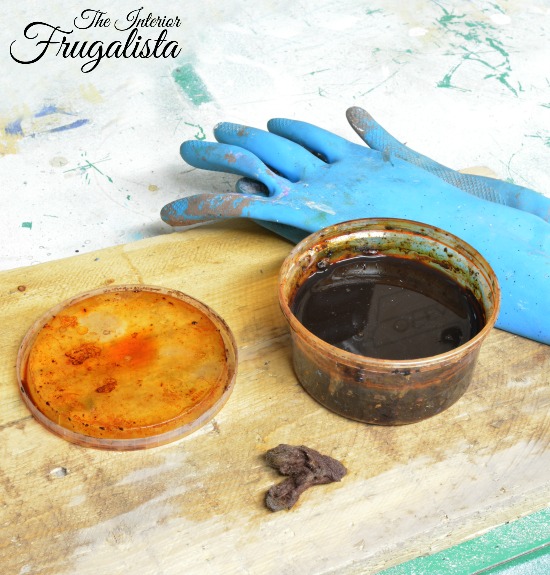
To give the scrap wood even more character, the boards are aged with this homemade Wood Aging Solution recipe from stuff in your kitchen.
You can see the difference between the treated and untreated wood in the photo below. When it dries the nail holes, knot holes, and imperfections in the wood are pronounced to give it a rustic charm.
How To Get The Look Of Galvanized Metal With Paint
The challenge was how to unify the patina on the metal garden tool key rack with the galvanized metal bucket.
The first thing I did was paint the key rack with matte metallic silver paint.
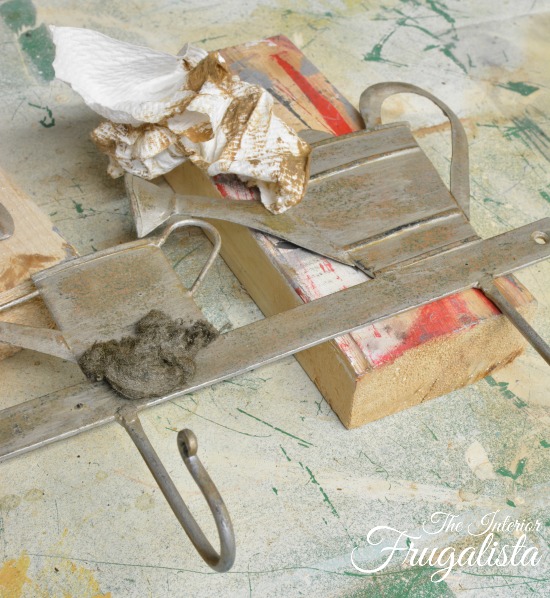
After it dried I lightly burnished it with the same aging solution used on the wood and removed the excess with a paper towel (pictured below).
We'll create the look of the white rust spots common on galvanized metal with paint. Dilute wicker white acrylic craft paint with a couple drops of water. With a small brush or toothbrush, flick the paint with your fingers to splatter white spots.
Next, dry brush medium gray paint on all the raised bits. To do this first offload the paint onto a paper towel until very little paint remains on the brush. With light pressure sweep the brush over the metallic paint on both the key rack and the galvanized bucket.
Once dry, lightly sand with #0000 steel wool to basically blend (burnish) the colors together. It's not a perfect match to the bucket but pretty darn close. Wouldn't you agree that the upcycled garden tool key rack looks so much better galvanized?
How To Transfer Graphics Onto Wood With Glossy Paper
Now we're ready to add the cute Bloom Where You Are Planted typography on the aged wood.
I created the graphic in PicMonkey and enlarged it to fit the length of the board. I changed the print settings for a mirror image (reverse print). I've included a free printable of the BLOOM typography HERE and the WHERE YOU ARE PLANTED typography HERE if you'd like to use it.
Now we're ready to print the graphic with your inkjet printer and transfer the typography onto the wood with this image transfer with gloss paper tutorial.
After you've transferred the typography onto the wood, paint the word BLOOM with an artist's brush and Tomato Red acrylic craft paint. Draw a shadow line with a fine point Black Sharpie marker.
Wall Mount Garden Tool Organizer Assembly
Attach the faux wrought iron water spout onto the pallet wood with 1 1/2-inch brown wood crews. On the back of the sign add two D-Ring picture hangers.
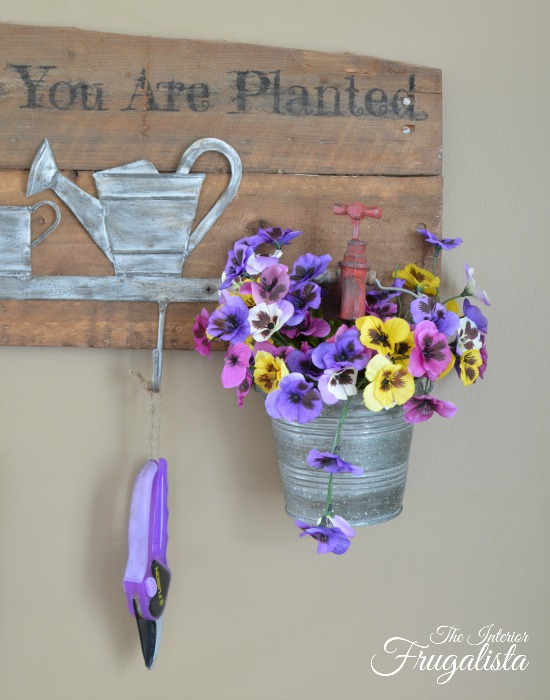
It's a little too early to be planting flowers here in Canada so I filled the galvanized bucket with faux pansies for now.
Hang the galvanized bucket onto the water spout and you're ready to find a new home for your new garden tool holder. No more searching for your gardening hand tools!
Here's another garden decor idea using mini garden tools from the dollar store. This handmade Garden Lovers Wreath is perfect to hang on the inside of a garden shed window. For more Spring and Summer DIY inspiration visit our Spring Ideas Page or our Summer Ideas Page where we share everything from water features to whimsical garden decor ideas.
Thanks for stopping by the Interior Frugalista today! I hope you were inspired by this handmade garden hand tool holder. If you have any questions, please leave them in the comment section below or the Contact Me tab at the top to drop me an email. I love hearing from you!
If you enjoyed this wall-mounted garden tool storage idea, I'd be so thankful if you shared it with a friend and pinned it to your Gardening Ideas or Garden Shed Decor board on Pinterest.

I share my projects at these inspiring link parties.


I WISH I had a place to put all your projects... I'm gonna have to pick and choose! ;-) Pinned!
ReplyDeleteAw, you're so sweet Julie! Thank you for your kind comment and the pin 🤗
DeleteI love this, Marie! What a fun and practical piece. It's one of my features at today's Snickerdoodle Party. Thanks for sharing with us!
ReplyDeleteYou made my Easter Sunday morning, Beverly! Thank you so much for the feature and Happy Easter 🐰
ReplyDeleteThanks so much Marilyn!
ReplyDeleteHello Marie! Just stopping by to let you know that I featured this sweet blog post at the Thursday Favorite Things blog Hop and Linky Party this week. Thanks for sharing at the party and thank you for stopping by to visit me at Vintage Mama's Cottage!
ReplyDeleteStop by and see the other features here:
http://vintagemamascottage.com/2019/04/25/favorite-things-for-a-spring-day/
Nina @ Vintage Mama's Cottage
Yes, I noticed that this morning when I came to party with you at TFT. Thank you so much Nina, I really appreciate the feature! xo
DeleteWhat a nice sign! And holder for those items. Mine are just in a drawer on the porch, but this is so much nicer. I'll be featuring this at this weekend's party :)
ReplyDeleteThrilled you like this idea for garden tool organization and even more thrilled to have it featured. Thank you so much Alexandra and Happy Easter!
DeleteYou have given me a great idea to try out. I am always looking for my garden tools because I leave them in so many spots. Your project looks amazing. Thanks so much for sharing with us this week. #HomeMattersParty
ReplyDeleteThrilled to hear you were inspired by our garden tool holder, Donna. Have fun making yours!
DeleteThis is the cutest thing ever!!! It looks fabulous, how lucky to find such a cute garden tool key holder, I love it!
ReplyDeleteJenna
Thanks so much, Jenna! I almost started jumping with joy in the middle of the Goodwill aisle when I spotted that key ring holder. LOL
DeleteAwh, this is SO lovely. What a fabulous find that hook thing was, and you made it look even better.
ReplyDeleteThank you very much, Julie, I'm glad you like it! No more missing garden trowels. LOL
Delete