Painted Hardcover Books With French Country Style
Are you like me and hate to get rid of books, especially the hardcover ones? Even if they are books you'll never read again, they can be hard to part with. Instead of having them collect dust on a bookshelf, I'm sharing a great idea for repurposing them into pretty home decor.
It's the best of both worlds, you get to keep your coveted books and give them a useful purpose. Pick out your least favorites and turn them into lovely painted hardcover books with French Country style.
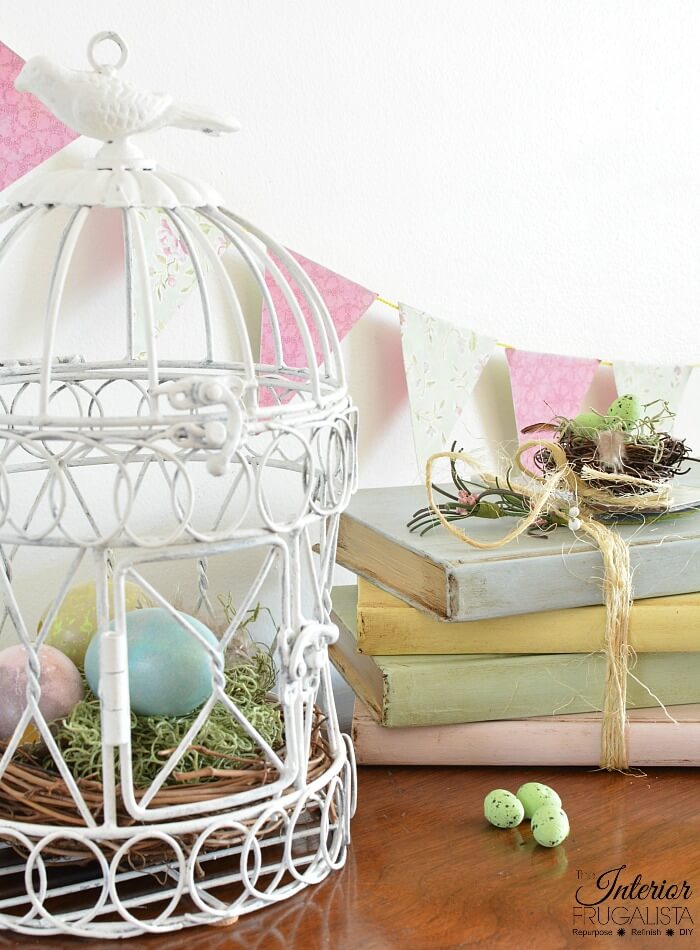
Painted pretty pastel colors, they are perfect for Spring decorating. Stacked on a coffee table tray, used as risers for bookcase decor, or set on a sideboard/dresser wrapped in a pretty ribbon. The possibilities are endless for painted hardcover book stacks.
DIY Painted Hardcover Books For Spring
If you're an avid reader, you probably have stacks of old books you can use for this purpose. And if you're not, no worries, peruse your local thrift stores for inexpensive hardcover books. Even the kitschy self-help books from the 80s are fair game because nobody is going to know once they are painted!
I chose four books around the same size to stack and tie with ribbon. But books in varying sizes add visual interest when stacked too.
Mine are pastel and metallic gold painted books with a time-worn patina. I'll show you how easy it is to get the look further down in the post.
Bound together with sisal rope and embellished with a small bird's nest, they are ready to be displayed in my Spring coffee table tray vignette.
This post contains affiliate links so you can see what products I used or recommend for this project. As an Amazon Associate, I earn a small commission from qualifying purchases at no extra cost to you.
Before we get into the nitty-gritty of how to paint the hardcover books for Spring, almost all of the DIY projects shared here at Interior Frugalista have step-by-step tutorials so why not get your budget DIY on and subscribe. You can also follow us on Pinterest, Facebook, Instagram, and YouTube.
How To Chalk Paint Hardcover Books For Spring
We'll start with painting the edges of the book pages metallic gold.
Book Pages Painted Metallic Gold
The first thing I did was with the books closed, paint the outside edge of the book pages with gold metallic paint. The gold looks so pretty with the pastel colors but we'll be doing more to the gold in another step.
Hand Painted Book Covers
The possibilities for painting the book covers are endless. Choose colors that work well with your decor, for instance, painted white for farmhouse style. I chose soft pastel colors for Easter with leftover chalk-style paint that I had on hand.
The pretty colors I chose are all from Country Chic Paint in the colors Vintage Cupcake (pink), Pistachio (mint), Creme Brulee (yellow), and Elegance (blue).
Paint the books with two to three thin coats of paint in each color. The paint dries quickly between coats but you can speed up the process with a blow dryer or heat gun set on low.
How To Give Old Painted Books A Time-Worn Patina
Once the paint is dry it's time to have fun giving the books an aged time-worn patina and it's very easy to do.
Pro-Tip
If you've never done this before it may seem intimidating but just remember brown wax can be removed with clear wax while it's still wet.
The key is a) not to put too much brown wax on the lint-free rag and b) not to use too much pressure when applying it.
First, brush a coat of clear wax over the painted books. This will prevent the brown wax from staining the paint and will make it easier to blend. I used white wax instead of clear wax to soften the pastel colors even more. You can apply the clear wax with a small wax brush or a lint-free rag.
Next, dab a little brown wax on a lint-free rag and with light pressure feather the wax along the edges and book spine like pictured in Step 1 below.
Blend the brown wax towards the center of the book, leaving more brown wax around the edges and corners like pictured in Step 2 above. Don't panic if you put too much brown wax in some areas. Just lightened the wax or remove it with clear wax.
How To Give Painted Book Pages An Aged Patina
With the books closed and a small artist brush, apply brown wax onto the book pages near the spine of the book like pictured below. Feather some of the brown wax on the opposite end of the book pages as well where they naturally age over time.
Allow the wax to cure for at least 24-hours until it no longer feels tacky to the touch. Then you're ready to decorate for Spring with your pretty painted books!
Ideas For Displaying Painted Hardcover Book Stacks
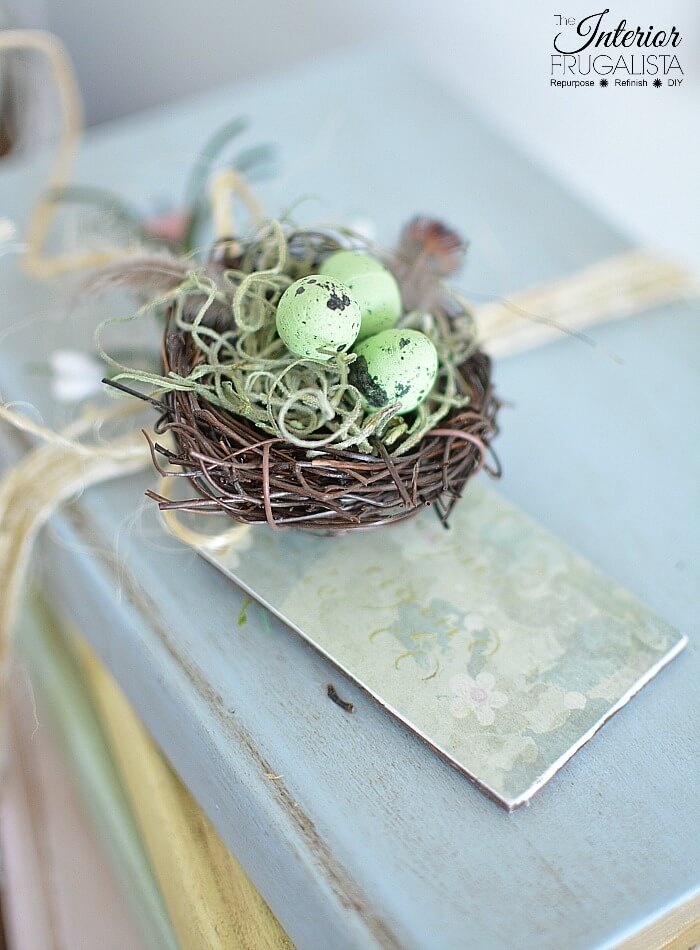
Stack the books according to size and wrap them with ribbon, lace, string, or twine. Hang beads, charms, tags, or other accessories to the ribbon. My book stack is embellished with a miniature bird's nest and a decoupage wooden tag.
How To Make Miniature Bird Nests
To embellish the painted books I made a miniature bird's nest with floral picks, mini foam eggs, feathers, and dried moss from the dollar store.
Remove the miniature nest from the floral pick. Set some dried moss inside the nest and attach it with a hot glue gun. I replaced the robin's egg blue eggs with green foam eggs that come in a package of 30 because my accent decor is green. Glue a few craft feathers inside the nest as well.
How To Decoupage Wooden Tags
You can buy these readymade wood tags but I made mine with a sheet of craft balsa wood that I had on hand. It's easy to make with a straight edge and sharp craft knife. I stained one side with a water-based stain and the other with pretty floral scrapbook paper. Decoupage the paper with Mod Podge and a foam brush. Super easy!
I hope I've inspired you to repurpose some of those old hardcover books in your bookcase collecting dust. The possibilities for painting them are endless for Spring, Summer, Fall, Winter, and holiday decor.
For more DIY inspiration visit our Spring And Easter Ideas page. You'll find wreaths, banners, birdhouses, centerpieces, and more.
Thanks for stopping by the Interior Frugalista today! I hope you were inspired by these painted books for Spring decorating. If you have any questions, please leave them in the comment section below or the Contact Me tab at the top to drop me an email. I love hearing from you!
If you enjoyed this book painting tutorial, I'd be so thankful if you shared it with a friend and pinned it to your DIY Spring Decor Ideas or Upcycled Home Decor Ideas board on Pinterest.

I share my projects at these inspiring link parties.


Spring-spiration.. Love it Marie! Your styling is spot on, so soft and spring-ee! :)
ReplyDeleteThank you so much, Denise. That means a lot coming from you, the Queen of gorgeous styling AND photos!
DeleteLove these Marie!
ReplyDeleteTania
Thank you Tania! It feels good to put the box of old books to good use.
DeleteSO PRETTY!!
ReplyDeleteThank you very much Robyn, appreciate that 😊 Have a great weekend!
DeleteWhat a lovely vignette with all the fun and charming details. I love how you painted the books and then aged them. Very pretty! Happy Spring to you...
ReplyDeleteTamara X
Thank you so much Tamara 🙂 I'm loving the soft pastel colors and think I'll keep them on display for Summer as well. Happy Spring back to you 🌷
DeleteMarie, those are just delightful! Perfectly spring and anyone can do it.
ReplyDeleteThank you Larissa!😊 Exactly, a fun and easy craft for Spring!
DeleteNever thought about painting books before. I have been inspired to rip off covers but these are beautiful, maybe I should leave the covers intact.
ReplyDeleteYes, I rip off the covers and wrap them in pretty ribbon too but painting covers gives you a couple of options for creatiing pretty vignettes. I plan on painting some for Fall, the holidays...well you get the picture.
DeletePretty spring book vignette. Happy Spring, Kippi
ReplyDeleteThanks Kippi, happy Spring to you as well 🌷
DeleteA lovely idea! I like pastel colors and how it looks like together. Thank you for inspiration.
ReplyDeleteThank you very much Simona, so glad you walked away feeling inspired 😊
DeleteMarie, these are too cute! I have lots of old books but have never thought about painting them to get colors I want for decorating in different seasons and I can change the paint color throughout the year! I love these! Hope you will consider sharing at Celebrate Your Story which is now live on my blog! Have a great day! Hugs!
ReplyDeleteThank you so much, Benita! I'm glad you walked away inspired to paint some of your old books. Wishes for a great day back to you!
DeleteI love this project. I've been waiting until I had some books I wanted to donate to the DIY cause. I have every supply needed to replicate your look. Never thought of using pastel paint colors. Great idea and thanks for sharing.
ReplyDeleteYay, so glad you have everything to replicate the look of these pretty pastel painted books. Have fun painting yours, Carol!
DeleteLove that you shared two projects in this one post! Pinned!
ReplyDeleteThanks for the pin, Julie! I don't share more than one project per post often but sometimes they just warrant it. I'll be doing it again next week with another Spring idea.
DeleteThese are rea;;u nice Marie. I ave painted books before and have some old encyclopedias
ReplyDeleteOld enclyopedias are perfect for this, Leanna! I'm happy to be putting all those self-help books from the 80's to good use instead of collecting dust in the basement. Painted books are perfect furniture makeover photo props too so you'll be seeing these ones again soon on the blog!
ReplyDeleteThat looks so perfectly Spring-like Marie. We have so many hardcover books at home that are just jumping up and down in the bookcase AND I swear they're saying I wanna look like that too. Can you hear them ;-)
ReplyDeleteYou crack me up, girl! Then I guess you better get busy 👩🏻🎨
DeleteMarie I never thought painted books could look so awesome till I saw yours. The wax and gold really add so much to the overall look of the books. Thanks for sharing this great tutorial with us. I need to go back and not throw out those old books but use them in this way and I know just the colors I will use. Thanks for the inspiration!
ReplyDeleteMusic to my ears, Mary! Love that my books inspired you to paint some of yours. 😊
DeleteThank you for hosting, Marilyn and for the pin!
ReplyDeleteSuch a great idea for old books that have less-than-desirable covers, Marie! And such pretty spring colors!
ReplyDeleteThank you Lora! I've got more waiting to be painted for other seasons. The possibilities are endless for painted hardcover books.
DeleteSuch pretty decoration for Easter/Spring! This will be one of my features this afternoon at the Snickerdoodle link party!
ReplyDeleteThank you very much for the feature Roseann! Glad you liked the painted hardcover books 😊
DeleteOutstanding idea..gotta go find me some books!
ReplyDeleteGlad you like it Sid and happy painting 😊
DeleteThank you so much for the pin and share, Marilyn! xo
ReplyDeleteI love these! The pastel colors make me happy. Pinned!
ReplyDeleteHi Lizzy, thank you and appreciate the pin!
Delete