Large Snowflake Decoration From Repurposed Chair Spindles
Time for another repurposed antique chair project. It's the chair that keeps on giving! Thanks to our Power Tool Challenge this month, I'm finally putting some of the chair spindles to good use with a large snowflake decoration for our Kris Kringle Secret Santa Gift.
The challenge is to build a holiday project using at least one power tool and gifting our Secret Santa creation to a member of the team. We had so much fun with this challenge last year that our team leader, Wendi from H20 Bungalow decided to bring it back again this year.
Repurposed Chair Spindle Christmas Snowflake
So far I've made a unique bird feeder with the chair back and a dog leash holder with the seat. You can see the other repurposed chair part ideas on my repurposed antique chair page.
If you're not familiar with the Power Tool Challenge Team, we are a group of tool-savvy female bloggers who want to empower our female readers to step out of their comfort zone and make a simple project using a power tool.
The large spindle snowflake decoration that I made for our challenge can be hung indoors or outdoors during the holidays. A group of these would be so festive hanging on a front porch or from tree branches in a front yard.
Alternatively, if you used smaller chair spindles, you could make wooden snowflake tree ornaments instead.
What You'll Need To Make It
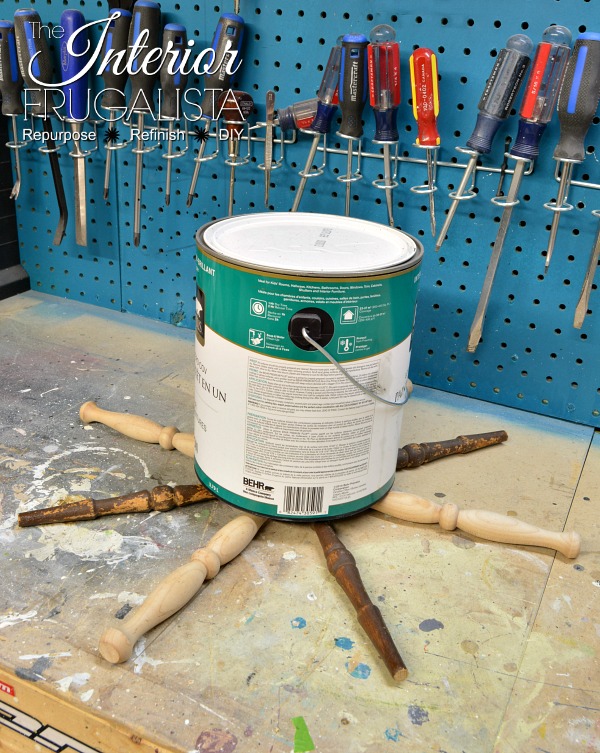
These are the supplies you'll need to make the chair spindle snowflake. I used a mix of smaller chair spindles from the old chair and larger unfinished ones that I found at a local architectural salvage yard.
Not pictured are the red wrought iron star-shaped knobs that I used to embellish the center of the snowflake decoration.
This post contains affiliate links so you can see what products I used or recommend for this project. As an Amazon Associate, I earn a small commission from qualifying purchases at no extra cost to you.
Supply List
- 4 Large and 4 Smaller Chair Spindles (salvaged)
- Small Piece 3/4-inch Plywood
- 2 Decorative Christmas Knobs (alternatives)
- Gorilla Wood Glue
- Dark Walnut Stain
- White Latex, Acrylic, or Chalky Paint
- Red and White Baker's Twine
- Snow-Tex
- White Glitter
- Artist Palette Knife
- Eye Hook
- 1 1/4-inch Double Threaded Dowel Screw (length is determined by the thickness of decorative knob you use)
Power Tool List
- Power Drill
- Compound Miter Saw
- Mouse Sander
- 2 1/4-inch Hole Saw Bit
- 5/16-inch Forstner Drill Bit
- 1/16-inch Pilot Hole Drill Bit
Here's How I Made It
Let's begin the tutorial with how to make the center medallion that the spindles will be attached to.
Center Snowflake Medallion
- Clamp a piece of 3/4-inch plywood onto a work table.
- Cut out a circle shape for the center of the snowflake with a 2 1/4-inch hole saw bit and a power drill.
Smooth the edges of the medallion with a mouse sander.
- Trace the medallion onto a piece of paper.
- Cut out the circle shape.
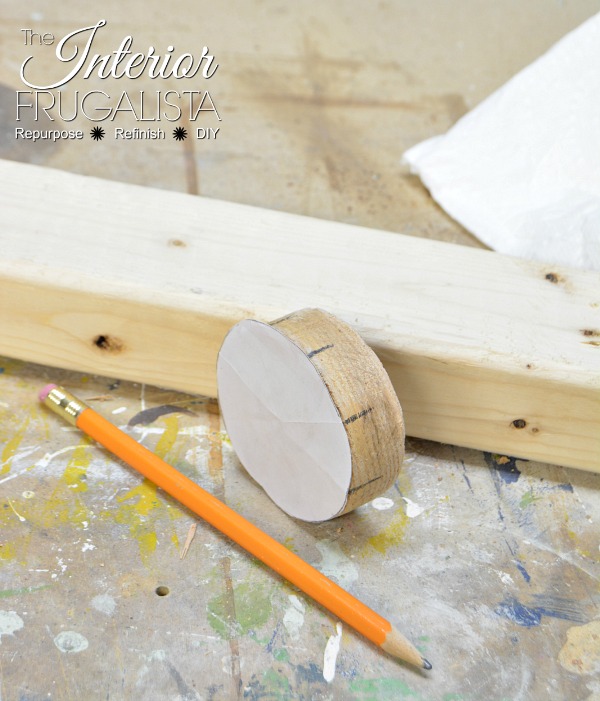
- Fold the circle in half, fold it in half again, and two more times until you have eight points for the snowflake (pictured below).
Holes For Chair Spindles
- Tape the template onto the medallion.
- Mark the sides of the medallion with a pencil at each fold like pictured below.
- Remove the template and on each line mark the side of the medallion with a dot.
- This is where the holes for each spindle will be drilled.
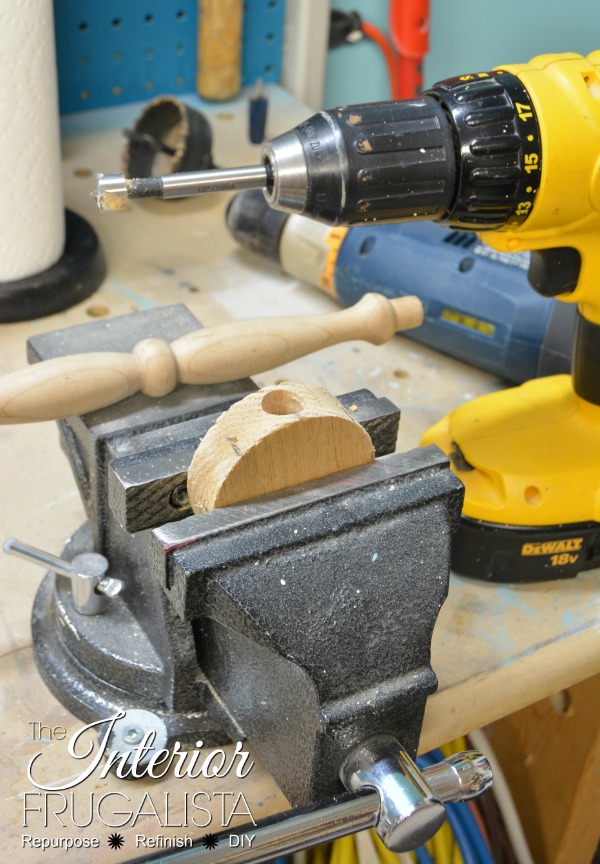
- Place the medallion into a vice to hold firmly in place.
- With a 1/16-inch pilot hole bit, drill a small hole on each dot.
With a 5/16-inch Forstner bit, drill a larger hole in each pilot hole the depth of the dowels on the ends of each spindle.
Chair Spindle Installation
On the opposite side of the spindles, cut the dowels off (unless you prefer keeping them on) with a miter saw. If you want to get real fancy you could taper them to a point.
Pro-Tip
In hindsight, I wish I would have cut more off the ends of the smaller chair spindles so they would be noticeably shorter than the larger spindles. Keep this in mind when making your snowflake.
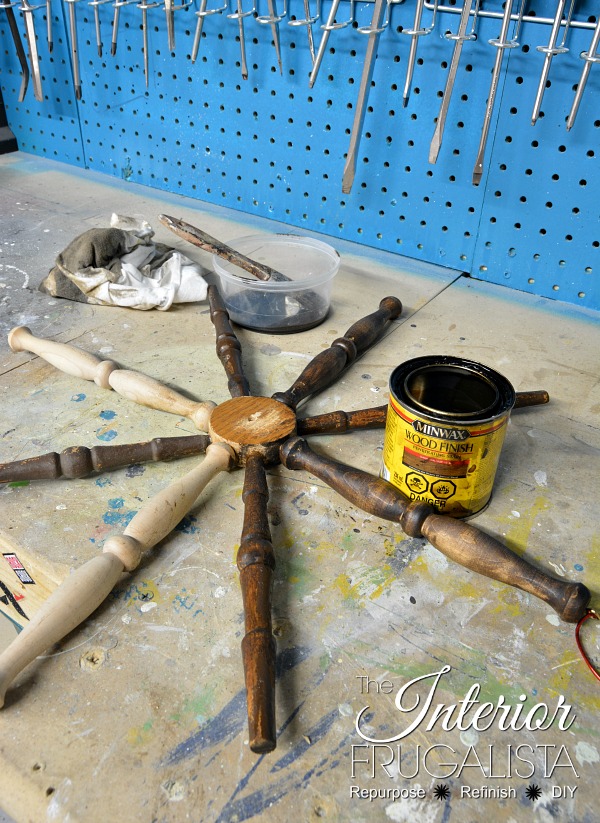
Add a generous amount of Gorilla wood glue into each hole on the medallion and insert the chair spindles. To prevent the snowflake from warping while the glue sets, place a heavy object on top and let it cure overnight.
Stain The Snowflake
The antique chair spindles are already stained a dark brown. To get the same dark brown patina on the new spindles, apply one coat of dark walnut stain with a lint-free rag.
White Dry Wash Paint Finish
Once the dark stain is dry, we'll apply a whitewash finish over the stain.
- To do this dip just the tips of the paintbrush into white acrylic craft or chalk paint.
- Dab the excess paint onto a paper towel - hence the term drybrush.
- With light pressure on the brush, swipe the white paint in long random brush strokes over the spindles.
- You want the paint to hit the raised parts of the snowflake but not completely cover the dark stain underneath.
- Allow it to dry to the touch (mere minutes).
- Repeat with another layer if need be. I applied three coats of white paint to get coverage that I liked.
Glistening Faux Snow
- Imagine if the snowflake were hanging outside, where snow would naturally accumulate?
- Using an artist's palette knife (or your fingers) apply layers of Snow-Tex in those areas.
- Before the Snow-Tex dries sprinkle the faux snow with white glitter so the snow glistens.
- Let it dry overnight.
Snowflake Embellishments
This step is completely optional but if you'd like to embellish the center of the snowflake, like I did with a festive knob, follow the steps below.
- Drill a hole in the center of the medallion the same diameter as the screw for the decorative knob that you chose.
- With pliers, thread the double-thread dowel screw into the medallion.
- Thread a decorative knob on each side of the medallion.
For the finishing touches to the DIY snowflake, thread a small eye hook onto the top of one of the longer chair spindles. Slip bakers twine through the eye hook and tie it in a bow. Now you're ready to hang the large snowflake decoration.
I hope the recipient of my DIY secret Santa gift likes the large snowflake decoration that I made for them.
Almost all of our DIY ideas have step-by-step tutorials so why not get your budget DIY on and subscribe. You can also find us on Pinterest, Facebook, Instagram, and YouTube.
Thanks for stopping by the Interior Frugalista today! I hope you were inspired by the repurposed chair spindle snowflake decoration.
If you have any questions, please leave them in the comment section below or the Contact Me tab at the top to drop me an email. I love hearing from you!
If you enjoyed this DIY Large Wooden Snowflake Decoration idea, I'd be so thankful if you shared it with a friend and pinned it to your DIY Christmas Decor or Repurposed Chair Ideas board on Pinterest.
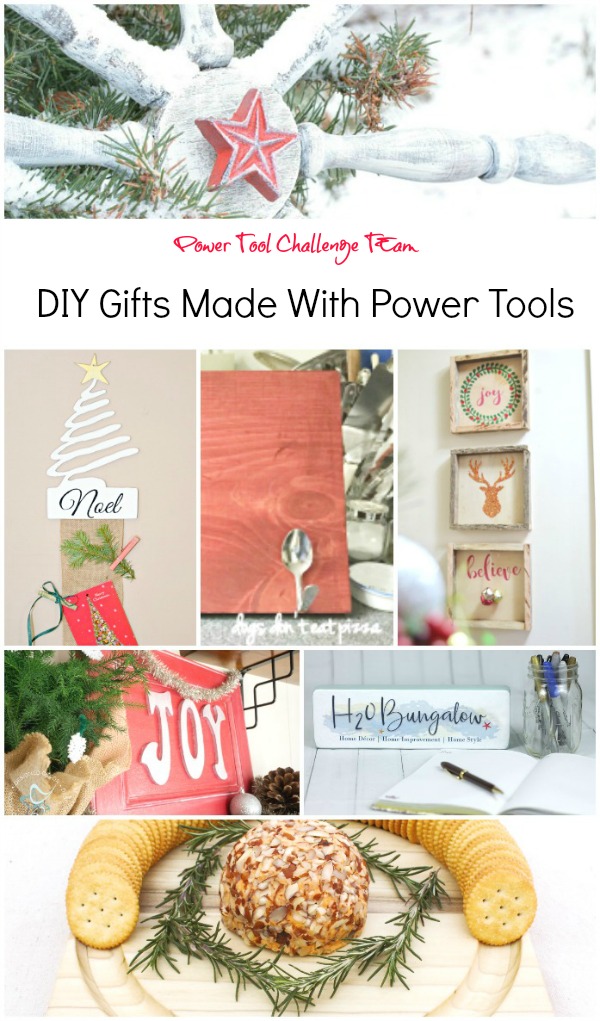
Now let's see what the rest of the team made for their DIY gift ideas. Click on the links below to visit all the inspiring ideas for the holidays.
Hanging Christmas Card Holder | H2O Bungalow
DIY Cookbook Stand | Dogs Don't Eat Pizza
DIY Pallet Wood Shadow Box | Create And Babble
Repurposed Cabinet Door Joy Plaque | Designed Decor
Textured Photo Transfers To Wood Blocks | The Kim Six Fix
DIY Cheese and Crackers Serving Board | Virginia Sweet Pea
Wooden Chair Spindle Snowflake | Interior Frugalista (that's me)
I share my projects at these inspiring link parties.







I was creating your pin for this post and I had to comment! These are absolutely adorable!
ReplyDeleteAwe, thank you so much Christina, I'm glad you like them!
DeleteBeautiful! And so easy with your instructions. But may I point out (pun intended) that snowflakes have six points, not eight? I'm not telling you that as a criticism, but because using your spindles more sparingly means more snowflakes! For every three you make this way instead, you save six spindles and get a bonus snowflake. 😊
ReplyDeletePoint taken! LOL
Delete