Four Basement Laundry Room Design Mistakes
Today I'm sharing four basement laundry room design mistakes we made with our budget-friendly room makeover. Why we should have focused on the function of this space as much as we did on the $500 makeover budget. Plus how we reconfigured the space using what we already had so it functions much better.
It's very wise to go into a room makeover with a clear budget in mind. But as we learned, hyper-focusing on getting the biggest bang for your buck without equal consideration for optimizing the layout will likely lead to a second makeover.
Can you guess the design mistakes in the photo above?
Design Mistakes With Our Basement Laundry Room
We were very proud of the night and day transformation we gave our Basement Laundry Room For Under $500. In the DIY laundry room makeover post, I share how to make an unfinished laundry room look amazing on a budget.
In the photo below, you can see the cold and dreary unfinished basement laundry room we had for far too many years. Not a space you want to spend much time in.
What a difference $500 and a whole lot of elbow grease made to transform this space. By using discontinued, clearance, and salvaged materials, we were able to design a beautiful basement laundry room on a small budget.
However, it didn't long for us to realize that there were some major flaws with the footprint of our design.
This post contains affiliate links so you can see what products I used or recommend for this project. As an Amazon Associate, I earn a small commission from any qualifying purchases at no extra cost to you. Thank you for your support!
4 Basement Laundry Room Design Mistakes
Admitting the design mistakes with our original basement laundry room makeover isn't easy and I considered not sharing the second makeover. But I decided to swallow my pride and share what we learned and how we fixed those design mistakes so you can avoid making similar mistakes.
Laundry Room Design Mistake 1 - Counter Depth
After getting our new appliances, the obvious choice at the time was to build a countertop over the front loading washer and dryer for folding laundry.
What we hadn't considered is that the 36-inch depth would make it near impossible to reach the electrical outlet. Aside from the plug-in for the appliances, this is the only outlet in the room for plugging an iron or fabric steamer.
Laundry Room Design Mistake 2 - Inaccessible Upper Cabinets
The depth of the counter also made accessing anything in the back of the upper cabinets impossible to reach without a step ladder.
Laundry Room Design Mistake 3 - Laundry Sink Placement
There were two issues with the placement of the laundry sink. One, we felt a bit claustrophobic using the sink because we'd be wedged between the upright freezer. With our basement workshop being adjacent to the laundry room, the sink is used on a daily basis for cleaning paint brushes.
This brings me to the second issue of having to walk the length of the room with dripping paintbrushes to get to the sink.
Laundry Room Design Mistake 4 - Appliance Configuration
Unfortunately, the wall with the washer and dryer hookups isn't wide enough to also fit our upright freezer. So instead we situated the freezer on the adjacent wall but at 28-inches deep, it stuck halfway into the room! I hated how it made the room feel crowded and disjointed.
To the left of the freezer is a pocket door that leads to the rest of the basement. When you entered the room to access the laundry sink, you had to walk around the freezer. Plus it wasn't the prettiest sightline from the sofa in the adjacent media room.
Excited about no longer having to do laundry in a cold dreary unfinished basement, I turned a blind eye to the design decisions I wasn't 100% satisfied with.
It didn't take long to realize how much that compromise would affect my dissatisfaction with using this space on a daily basis. Had we put as much focus on the design elements as we did on the $500 budget, we could have saved ourselves laundry room makeover number two.
Design Tips For A Basement Laundry Room
During the planning stages of fixing our basement laundry room design mistakes, I learned that Michele at The Redesign Habit published The Redesign Toolkit: A DIY Guide To Budget-Friendly Interior Design e-book. In it, she includes a room evaluation worksheet with important questions to ask yourself before embarking on a room makeover.
I wish I had known about the worksheet before our laundry room makeover! I've included an example of some of the worksheet questions below along with my answers. They were very insightful in determining how best to fix our laundry room design mistakes.
What things do you like about the room?
Answer:- Having a laundry sink.
- The space-saving upright freezer.
- The red front-loading washer and dryer, especially that they are my favorite color.
- Having a long counter for folding laundry.
- Upper and lower cabinets for laundry cleaning supplies and essential storage. I also love that they are white to brighten the small basement space.
- The natural light coming from the window.
- The handy suspended clothes drying rod for hanging laundry indoors to dry.
What are the storage needs for this room?
Answer:- Hidden shelving for detergents and other laundry essentials
- Tall lower cabinets to fit a garbage can, dryer clothes drying rack, and heavy laundry detergent containers
- Open shelving for towels and laundry room decor
- Ironing board and laundry basket storage when not in use
- Clothes drying rod
- Paper towel holder and towel bar near the sink
How do you want your space to feel when it's finished?
Answer:- Spacious
- Functional work triangle between the three appliances
- Nice and bright
- A pleasant room to spend time in that doesn't feel like you are in the basement
What things do you not like about the room?
I answered that question earlier when I listed the four basement laundry room design mistakes that we made.
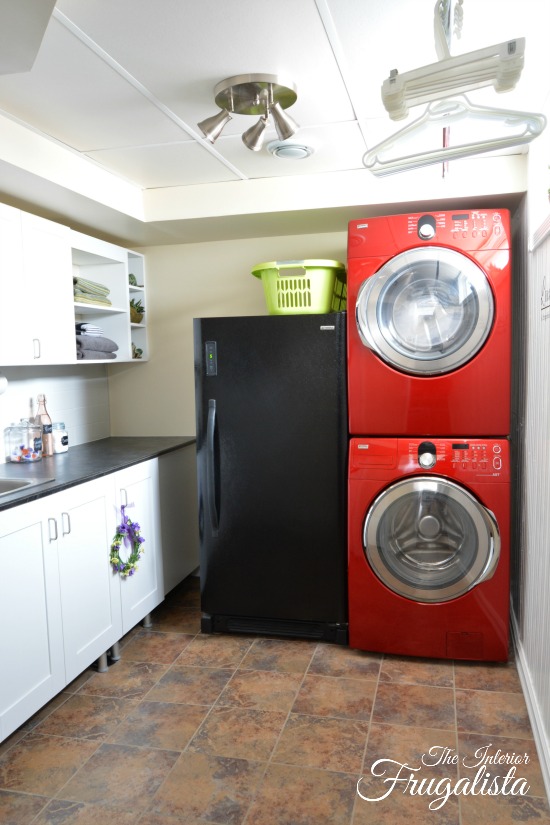
After completing the questionnaire, we were able to come up with a much better design plan for improving the footprint of our small basement laundry room. Thankfully we were able to salvage most of what we built in the original makeover to tweak the room and you can see the huge improvement in the photos below.
Big difference, right?
That odd space between the upright freezer and the cabinets is where we store our ironing board (not pictured).
How do I redesign my basement laundry room?
I hope you find our basement laundry room redesign and solutions for fixing our design mistakes below helpful. Especially if you also have a small laundry room footprint to incorporate three appliances, a laundry sink, a counter for folding clothes, and adequate storage space.
Design Mistake Solution 1 - Stack Washer and Dryer
By purchasing the stacking kit for our front loading washer and dryer, we were able to fit the upright freezer beside them on the same wall. Having all three appliances on the far wall greatly improved the traffic flow, work triangle, and spaciousness of the room.
Design Mistake Solution 2 - Reconfigure Laundry Room Cabinets
Moving the appliances opened the other wall for a bank of upper and lower cabinets. We now had the space to add additional lower cabinets for much-needed storage potential. We found them on clearance at Home Depot and they have the same profile as the existing DIY cabinets.
Rather than a traditional kick plate on the bottom, the metal feet add an airiness which helps the room feel more spacious.
Design Mistake Solution 3 - Improve Access To Upper Cabinets
Thankfully we were able to salvage our DIY upper cabinets and open shelving. Changing the configuration so the most used cabinets are above the sink makes them easier to access.
The less-used open shelving is now situated on the opposite end to store extra towels for our basement bathroom. The smaller shelving unit in that awkward space beside the freezer is used for displaying decor and such.
Design Mistake Solution 4 - Reduce Depth Of Countertop
Thankfully we were able to reuse the old countertop after a few modifications so it fits over the new lower cabinets. To do this we decreased the depth from 36-inches to 24-inches, making it much easier to reach the electrical plug for the iron and fabric steamer.
Design Solution 5 - Move Laundry Sink
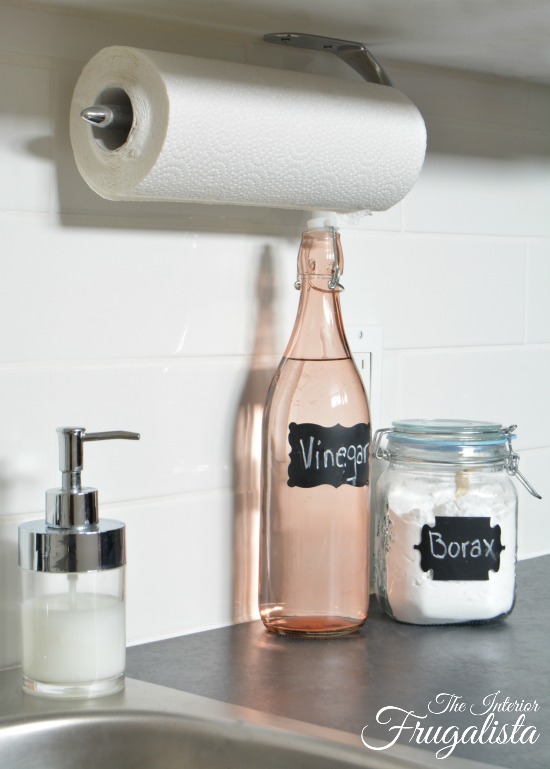
The laundry sink is now located next to the sliding pocket door leading to the hallway. No more walking across the entire laundry room with dripping paint brushes! We also added a much-needed towel bar on the end of the lower cabinets and a cabinet mount paper towel rod.
Unfortunately, we were unable to salvage the old Twill White Field subway tiles that we loved so much. Instead, we found simple 4 x 16-inch white subway tiles for a good price and I like the contrast with the dark counter. We used white grout to give the tiles a clean seamless look.
We painted the end of the upper cabinet above the sink into a fun chalkboard with black chalkboard paint and framed it with white wood trim. Then we added a small hook and hung a burlap pouch to store sticks of chalk.
I'm so glad we were able to salvage most everything from the original laundry room makeover. Fixing our laundry room design mistakes cost less than $100 and we couldn't be happier with the difference it made to the function of the room.
Thanks for stopping by the Interior Frugalista today! I hope you learned something from our laundry room design mistakes and found the solutions helpful.
Almost all of our DIY ideas have step-by-step tutorials so why not get your budget DIY on and subscribe. You can also find us on Pinterest, Facebook, Instagram, and YouTube.
If you have any questions, please leave them in the comment section below or the Contact Me tab at the top to drop me an email. I love hearing from you!
If you enjoyed these tips for avoiding basement laundry room design mistakes, I'd be so thankful if you shared them with a friend and pinned it to your favorite board on Pinterest.
I share my projects at these inspiring link parties.


Thank you so much for your awesome support of my work. I'm thrilled to have our basement laundry room featured! xo
ReplyDeleteThis is such an informative post, Marie. I love that you showed the problems and then the solutions. Your revamped laundry room looks great and very functional.
ReplyDeleteThank you very much, Beverly, I'm glad to hear you found the post informative! I'm so glad we decided to tweak the original design because I couldn't be happier with our laundry room now and actually enjoying doing laundry in this space.
Delete