How To Build A Large Rustic Plank Wood Clock
For years we've struggled with what to hang on the 12-foot wall in our front entry. The wall needed a large statement piece because it has a direct sightline to our living room and dining room above. Many times when I've left my phone in another room, I've reminded myself that we need a clock in the living room. Recently when it happened again I had a lightbulb moment. Why not build a large rustic plank wood clock for the entryway wall! My next question was what do we make it with?
I wish we had a pile of reclaimed barn wood to pick from to build the clock but no such luck. Instead, we used brand new fence boards and made them look like reclaimed boards and I'm going to show you how we did it.
When you scroll through the tutorial below, it may seem at first glance like there are a lot of steps to making the wood clock. I promise it is a simple build if you are comfortable with power tools and I've broken each step into bite-size pieces to make the instructions easier to follow.
Before we get into the nitty-gritty I should mention that we are self-taught DIYers and not trained professionals. This step-by-step tutorial is based on our building knowledge only. However, if you are a do-it-yourselfer like us, you'll find these steps helpful for building a version of our rustic wall clock.
Let's get started!
On the fourth board (middle board) mark the center of the clock by measuring 19-inches from the edge of the boards. With a 3/8"drill bit, drill a hole for the stem of the clock hands to fit through. This will also be our guide for making the circle. But before we get to mounting the clock mechanism we need to install uprights on the back of the clock.
Line the uprights across all the boards level with one another on either side of where the clock mechanism will be mounted in the center. Line the uprights level with one another because the picture hangers will be mounted on them later.
Secure the uprights to each board with 1-inch wood screws (pictured below).
Step 3 - Clock Mechanism Mount
Lay the clock mechanism over the center mark and trace the outline with a pencil. Depending on the thickness of the boards and the maximum depth of the clock mechanism (ours was 7/8-inches) you may need to notch out some of the wood to recess the clock mechanism (as pictured above).
Note: The mechanism should rest below the depth of the uprights. I would urge you to do this with a Router and Plunge Router Bit. Our son borrowed our router so we had to notch ours the old fashioned way using a chisel and hammer - hence the crude opening.
Clamp the boards onto a worktable and use a jigsaw to cut along the circle, turning and reclamping as you go.
With a mouse sander, smooth the raw edge around the clock.
We'll start with the darkest paint color and work our way to the lightest color using a dry brush paint technique.
The first dry brushed layer of paint is Americana Decor Chalky Finish in the color New Life Green, a sage green color. The next layers of paint are from Country Chic Paint in the colors Rocky Mountain Gray, Luscious Lime, and finally Simplicity White. It's important that you let each color dry to the touch before moving onto the next or they will blend into one another. With the dry brush technique, the paint dries to the touch in mere minutes.
Cut the clock face out and transfer it onto the plank clock using this Image Transfer Technique.
Alternatively, you could use a Cricut Maker or Silhouette machine to cut vinyl numbers, or you could glue wooden numbers onto the clock, or use a clock face stencil.
Attach Large D-Ring Hooks onto the top of each upright measuring 1-inch down from the top and screw in place. Insert one AA battery into the clock mechanism and you're ready to hang the clock on the wall.
During my home staging career, I learned this very handy No-Measure Tip For Hanging Wall Art and it makes the job so easy. Included is a D-hook installation tip that prevents them from flopping over when you're trying to hang the art.
Whew, that was a long-winded post but hopefully, it answered any questions you may have about how to build a rustic plank wood clock.
If you have any questions about this DIY Clock Tutorial, please leave them in the comment section below or the Contact Me tab at the top. I love hearing from you!
If you enjoyed this Large Rustic Wall Clock idea, I'd be so thankful if you shared it with a friend and pinned it to your DIY Clock or Farmhouse Wall Decor board on Pinterest.

I share my projects at these inspiring link parties.
How To Build A Large Rustic Plank Wood Clock
I wish we had a pile of reclaimed barn wood to pick from to build the clock but no such luck. Instead, we used brand new fence boards and made them look like reclaimed boards and I'm going to show you how we did it.
When you scroll through the tutorial below, it may seem at first glance like there are a lot of steps to making the wood clock. I promise it is a simple build if you are comfortable with power tools and I've broken each step into bite-size pieces to make the instructions easier to follow.
Before we get into the nitty-gritty I should mention that we are self-taught DIYers and not trained professionals. This step-by-step tutorial is based on our building knowledge only. However, if you are a do-it-yourselfer like us, you'll find these steps helpful for building a version of our rustic wall clock.
Let's get started!
What You'll Need To Make It
This post contains affiliate links so you can see what products I used or recommend for this project. As an Amazon Associate, I earn a small commission from qualifying purchases at no extra cost to you.Supply List
- (8) 6-foot pine fence boards
- High Torque 18"- 22" Clock Hands with Mechanism
- Wood Glue
- Wood Aging Solution (recipe provided)
- Lime, Grey, Sage, and White Waterbased Paint
- Graphite Paper
- Clear Wax
- Dark Wax
- Lint-Free Rag
- Large D-Ring Picture Hangers
Tool List
- Mitre Saw
- Jigsaw
- Power Drill
- 3/8" Drill Bit
- Mouse Sander
- 1-inch Wood Screws
- Large Woodworking Steel Bar Clamps
- Trammel Circle Marker
- Router with Plunge Router Bit
- Kreg Pocket Hole Jig
How To Age The New Fence Boards
First, we're going to make those brand new pine fence boards look like they've been weathered over time and we're going to do it with stuff from your kitchen. You read that right, here is a link to my Recipe For Aging Wood Naturally.How To Build The 38-Inch Plank Wood Clock
Line up the good side of seven fence boards side-by-side facing downwards on your worktable. You can join the fence boards one of two ways.Step 1 - Clock Assembly A
Add a bead of wood glue to the edges of each board and butt the boards up to one another. Clamp in place with large woodworking clamps and leave overnight to set.Clock Assembly B
Use pocket holes to join the boards together with a Kreg Pocket Hole Jig. This makes for a much tighter and stronger joint system.On the fourth board (middle board) mark the center of the clock by measuring 19-inches from the edge of the boards. With a 3/8"drill bit, drill a hole for the stem of the clock hands to fit through. This will also be our guide for making the circle. But before we get to mounting the clock mechanism we need to install uprights on the back of the clock.
Step 2 - Installing Uprights To The Back Of The Clock
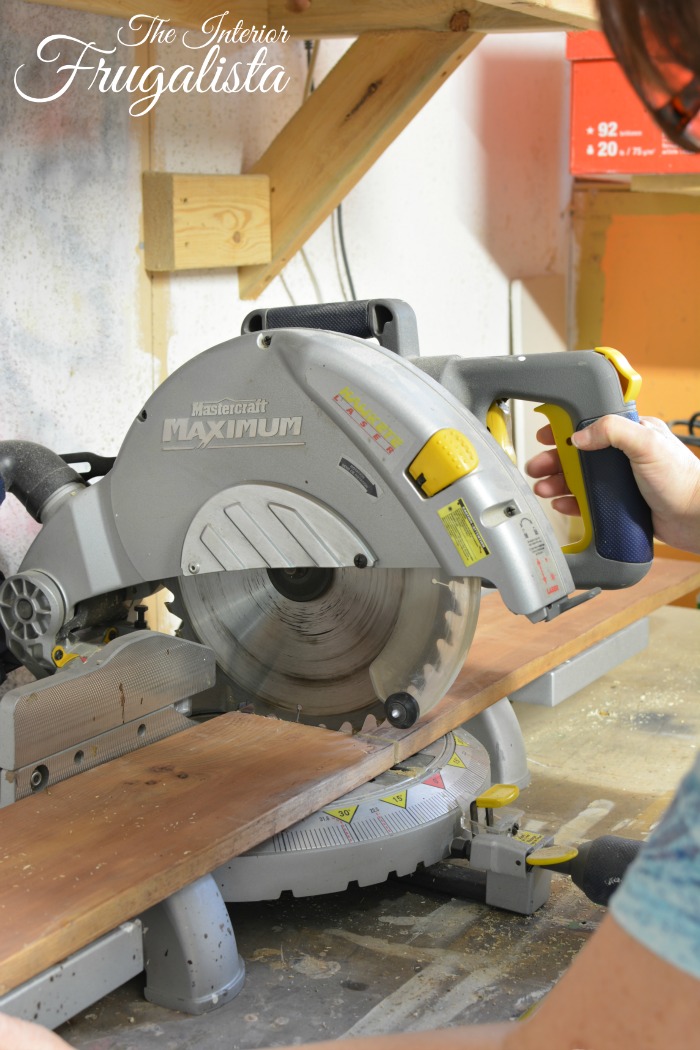
Cut the eighth fence board in half with a miter saw to make two 3-foot uprights (battens) to secure all the boards.Line the uprights across all the boards level with one another on either side of where the clock mechanism will be mounted in the center. Line the uprights level with one another because the picture hangers will be mounted on them later.
Secure the uprights to each board with 1-inch wood screws (pictured below).
Step 3 - Clock Mechanism Mount
Lay the clock mechanism over the center mark and trace the outline with a pencil. Depending on the thickness of the boards and the maximum depth of the clock mechanism (ours was 7/8-inches) you may need to notch out some of the wood to recess the clock mechanism (as pictured above).Note: The mechanism should rest below the depth of the uprights. I would urge you to do this with a Router and Plunge Router Bit. Our son borrowed our router so we had to notch ours the old fashioned way using a chisel and hammer - hence the crude opening.
Step 4 - Cutting The Clock Circle
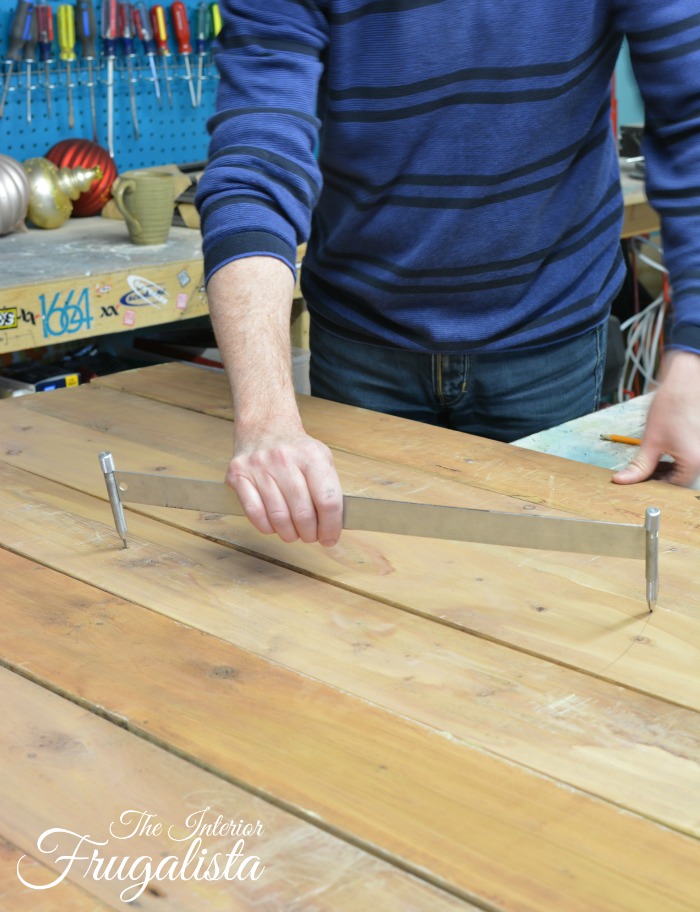
Using a Trammel Circle Marker, draw out a 38-inch diameter circle on the backside of the clock with the pointed end of the Trammel in the center hole you drilled earlier for the clock hand stem.Clamp the boards onto a worktable and use a jigsaw to cut along the circle, turning and reclamping as you go.
With a mouse sander, smooth the raw edge around the clock.
Paint New Boards With Time-Worn Reclaimed Wood Patina
Now that the clock is assembled with the naturally aged new fence boards, time to dry brush layers of paint to give the clock that time-worn reclaimed wood patina.We'll start with the darkest paint color and work our way to the lightest color using a dry brush paint technique.
Dry Brush Paint Technique
Dip just the tips of the paintbrush into the paint and offload the excess onto a paper towel - hence the term "dry brush". With light pressure on the brush swipe long random brush strokes across the grain of the wood. We're not aiming for full coverage here and want a lot of the natural wood exposed.The first dry brushed layer of paint is Americana Decor Chalky Finish in the color New Life Green, a sage green color. The next layers of paint are from Country Chic Paint in the colors Rocky Mountain Gray, Luscious Lime, and finally Simplicity White. It's important that you let each color dry to the touch before moving onto the next or they will blend into one another. With the dry brush technique, the paint dries to the touch in mere minutes.
How To Add Clock Face Numbers
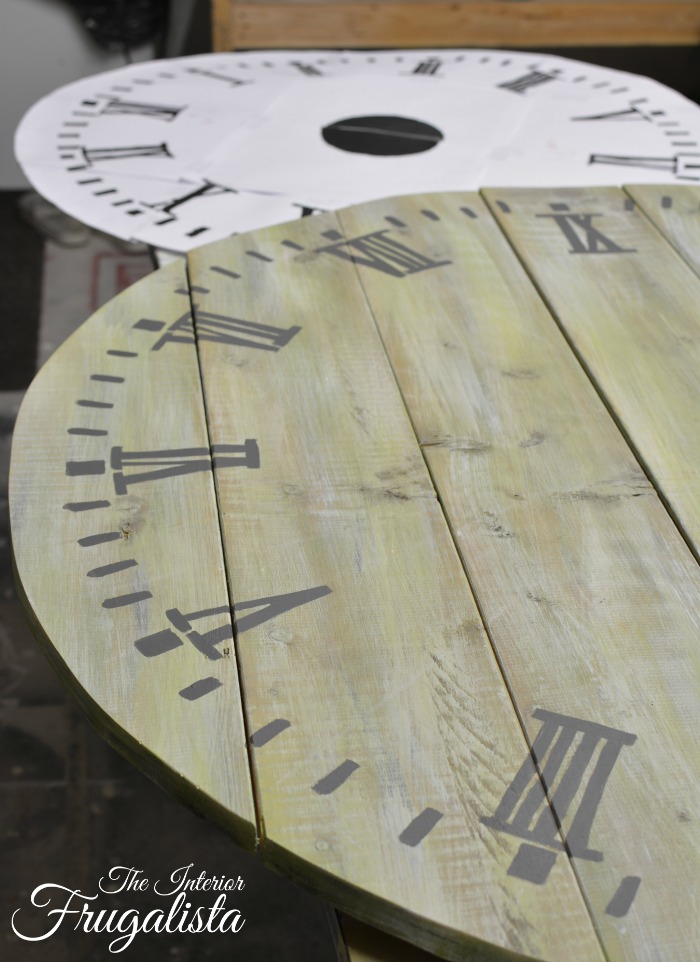
I found a roman numeral clock face graphic at the Graphics Fairy website and uploaded the graphic to Block Poster to enlarge it to fit my 38-inch clock. It will print on multiple sheets of bond paper and you piece the template together with tape.Cut the clock face out and transfer it onto the plank clock using this Image Transfer Technique.
Alternatively, you could use a Cricut Maker or Silhouette machine to cut vinyl numbers, or you could glue wooden numbers onto the clock, or use a clock face stencil.
Protecting The Painted Clock With Wax
Once the last coat of paint dries, apply a thin coat of clear wax with a lint-free rag or a round wax brush. You'll notice it deepens the paint layers. To give the paint layers a time-worn aged patina it's easy to do with dark wax. Applied much the same as the clear wax except this time you need to wipe the excess with a lint-free rag. You want the dark wax to nestle in the knot holes and grain of the wood and lightly stain the paint brown.Attach Large D-Ring Hooks onto the top of each upright measuring 1-inch down from the top and screw in place. Insert one AA battery into the clock mechanism and you're ready to hang the clock on the wall.
Mounting The Clock Mechanism
You'll need to use a high torque clock mechanism for large clocks. Attach the clock mechanism to the back of the clock with E6000 glue. Attach the clock hands to the stem on the front of the clock following the instructions on the package. Insert the batteries and you're ready to hang the clock on the wall.No Measure Tip For Hanging The Clock
Last but not least it's time to hang the heavy clock on the wall. If you've hung wall art that has double picture hanger hooks before then you know how frustrating it can be to get both nails lined up on the wall perfectly level.During my home staging career, I learned this very handy No-Measure Tip For Hanging Wall Art and it makes the job so easy. Included is a D-hook installation tip that prevents them from flopping over when you're trying to hang the art.
Whew, that was a long-winded post but hopefully, it answered any questions you may have about how to build a rustic plank wood clock.
Update July 2020
We recently gave our living room a mini makeover and moved the rustic clock above our fireplace but to do so it required some modifications. You can find that post here in my Modern Farmhouse Wall Clock Makeover.If you have any questions about this DIY Clock Tutorial, please leave them in the comment section below or the Contact Me tab at the top. I love hearing from you!
If you enjoyed this Large Rustic Wall Clock idea, I'd be so thankful if you shared it with a friend and pinned it to your DIY Clock or Farmhouse Wall Decor board on Pinterest.

I share my projects at these inspiring link parties.


Comments
Post a Comment
Don't be shy, I love reading your comments and reply to every single one! If you want to be notified when I reply back to you, click the "Notify Me" button below the comment box.