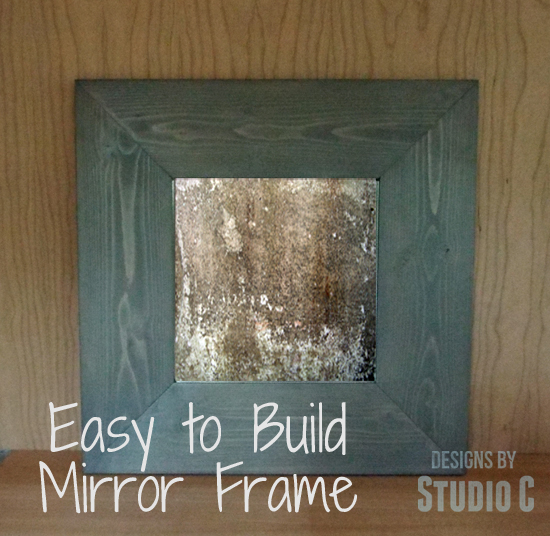
Easy To Build Mirror Frame with Designs By Studio C
Good Morning Everyone!
Today I have the great pleasure of introducing you to Cher, the talented blogger behind Designs by Studio C. Cher is a Rockstar at designing furniture and home decor and she offers professional drawings and tutorials with her builds. I hope you enjoy her Easy To Build Mirror Frame that she is sharing with you today! So without further ado, meet Cher...
Hello, Interior Frugalista fans! My name is Cher and I create furniture plans as well as other DIY projects over at Designs by Studio C. I created a super-easy woodworking plan to build a large mirror frame exclusively for you while Marie is recuperating (get well soon, Marie!). This plan is an excellent choice for those wanting to get started with woodworking and if you don't have any or all of the tools needed, I will offer other alternatives along the way!
Thanks so much, Frugalista readers, for letting me fill in for Marie!
See, I told you Cher provides the best drawing plans and tutorials with her builds! I hope you all enjoyed her Easy To Build Mirror Frame.
I urge you to pop over to Designs By Studio C to give her a warm hello and check out more of her fabulous furniture plans, DIY projects, and lots of How To Information.
Thank you so much, Cher for so generously helping me out during my recovery by sharing this awesome project with my readers!
Today I have the great pleasure of introducing you to Cher, the talented blogger behind Designs by Studio C. Cher is a Rockstar at designing furniture and home decor and she offers professional drawings and tutorials with her builds. I hope you enjoy her Easy To Build Mirror Frame that she is sharing with you today! So without further ado, meet Cher...
Easy To Build Mirror Frame
Hello, Interior Frugalista fans! My name is Cher and I create furniture plans as well as other DIY projects over at Designs by Studio C. I created a super-easy woodworking plan to build a large mirror frame exclusively for you while Marie is recuperating (get well soon, Marie!). This plan is an excellent choice for those wanting to get started with woodworking and if you don't have any or all of the tools needed, I will offer other alternatives along the way!
Here is what you'll need:
- 1 - 1x6 board at 8'
- Drill
- Pocket hole jig with 1-1/4" pocket hole screws
- Wood glue
- Router with 1/4" rabbeting bit
- Miter saw (or a miter box with a hand saw)
- 12" square mirror
- Picture framing tab gun or mirror clips
- Stain and sealer or primer and paint
- Picture hanging wire with fasteners
Cut List:
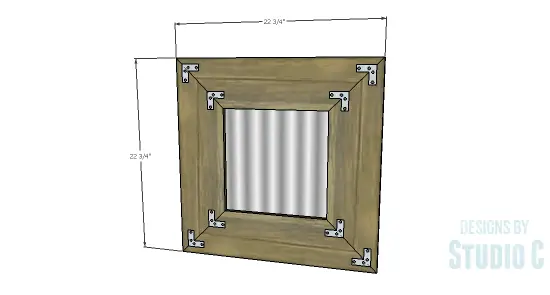
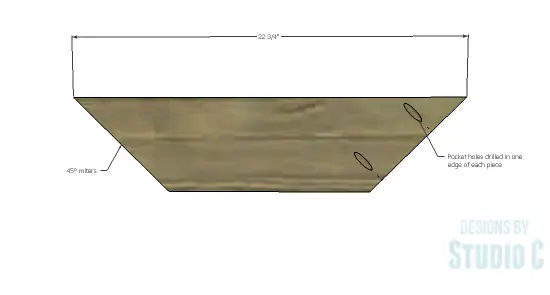
- 4 - 1x6 at 22-3/4"

Step One
Cut the pieces for the frame to length. Home Depot can make these cuts for you when you purchase your board, but they will not make the mitered cuts. Don't worry - they are easy to do! The cut are 45° angles and can be made on a miter saw but if you do not own a miter saw, a miter box can be used (they are very inexpensive) with a hand saw to make the cuts. I suggest drawing a diagonal line at the end of each board where the cuts will be made.Step Two
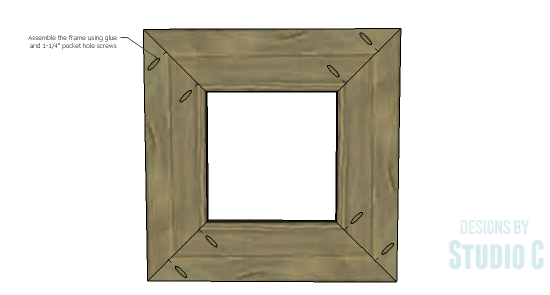
If you have a pocket hole jig, drill pocket holes in one mitered edge of each board, then assemble the frame using glue and 1-1/4" pocket hole screws. If you do not have a pocket hole jig, use metal corner brackets instead. These (along with the screws) can be spray painted beforehand!Step Three
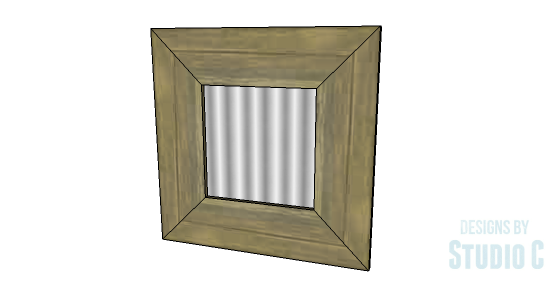
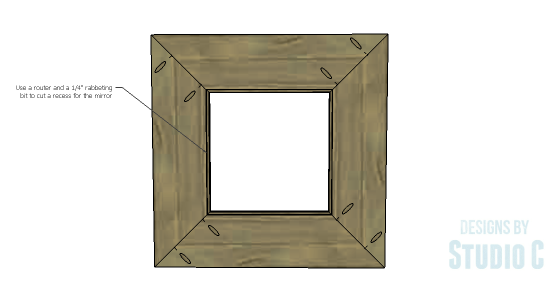
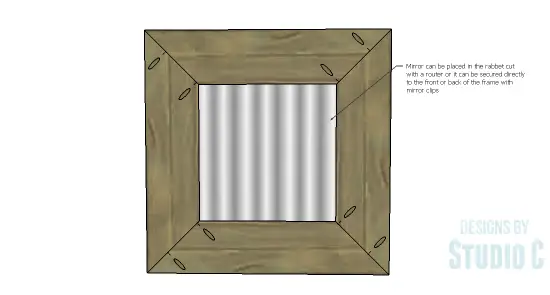
Once the frame is assembled, use a router with a 1/4" rabbeting bit to cut a recess on the backside of the frame to accommodate the mirror. Secure the mirror in place with a picture framing tab gun. If you do not have a router with a rabbeting bit or picture framing tab gun, the mirror can still be secured to the back of the frame (or even to the front for a different look) using regular mirror clips!Step Four
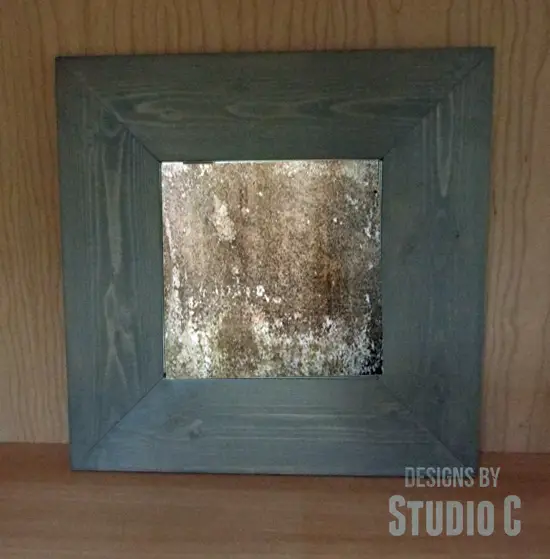
Fasten the picture frame wire fasteners to the back of the frame according to the manufacturer's instructions. I used soda can tabs with small screws and washers. Finish the frame as desired. I used a metallic polyurethane to finish this frame. The frame is wide enough that it can be stenciled for further decoration or if making it as a gift, the recipient's name can be added to it. How cool is that?Thanks so much, Frugalista readers, for letting me fill in for Marie!
See, I told you Cher provides the best drawing plans and tutorials with her builds! I hope you all enjoyed her Easy To Build Mirror Frame.
I urge you to pop over to Designs By Studio C to give her a warm hello and check out more of her fabulous furniture plans, DIY projects, and lots of How To Information.
Thank you so much, Cher for so generously helping me out during my recovery by sharing this awesome project with my readers!

By: Marie | Interior Frugalista
Tag:
Mirrors
Comments
Post a Comment
Don't be shy, I love reading your comments and reply to every single one! If you want to be notified when I reply back to you, click the "Notify Me" button below the comment box.