Repurposed Mid-Century Modern Headboard Faux Fireplace
How to turn a mid-century modern headboard with sliding doors into a gorgeous craftsman-style faux fireplace.
Remember the mid-century modern headboards with sliding doors? I believe they called them bookcase headboards. I came across this unique one at our local thrift store. As soon as I set eyes on those lovely stained glass sliding doors, I no longer saw a headboard and it had to come home with me.
Vintage Headboard To Craftsman Style Faux Fireplace
I knew if we didn't take it right then and now, it would be gone by the time we came back with a larger vehicle.
Determination is my middle name so before anyone else could claim it, we had that old headboard stuffed into the trunk of our Ford Taurus sedan with the help of a staff member who stood shaking his head in disbelief as we drove away.
This is what the headboard looked like before. Remember these?
My sister and I had one similar growing up but without the pretty stained glass doors. She used to hide wads of chewing gum in the cubby on her side while mine was full of V.C. Andrews books.
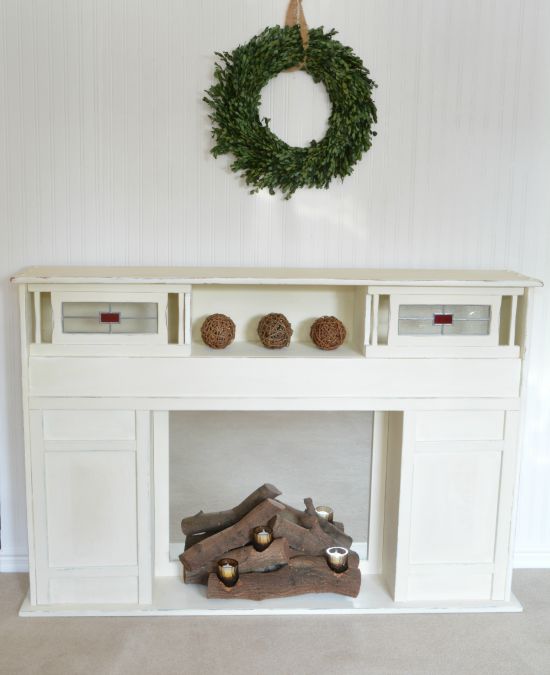
Anyway, what I envisioned for this headboard, dictated by the stained glass, was a gorgeous craftsman-style fireplace. The sliding doors are perfect for hiding media components if one planned on mounting a television above the fireplace.
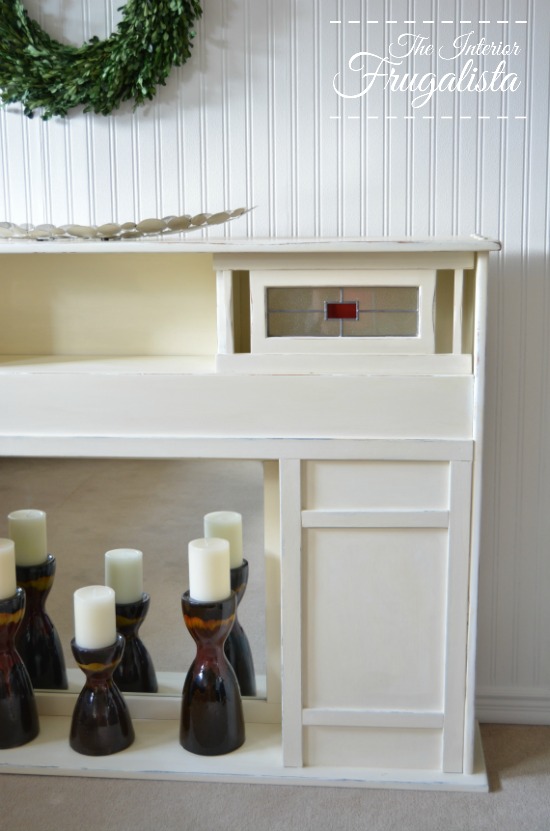
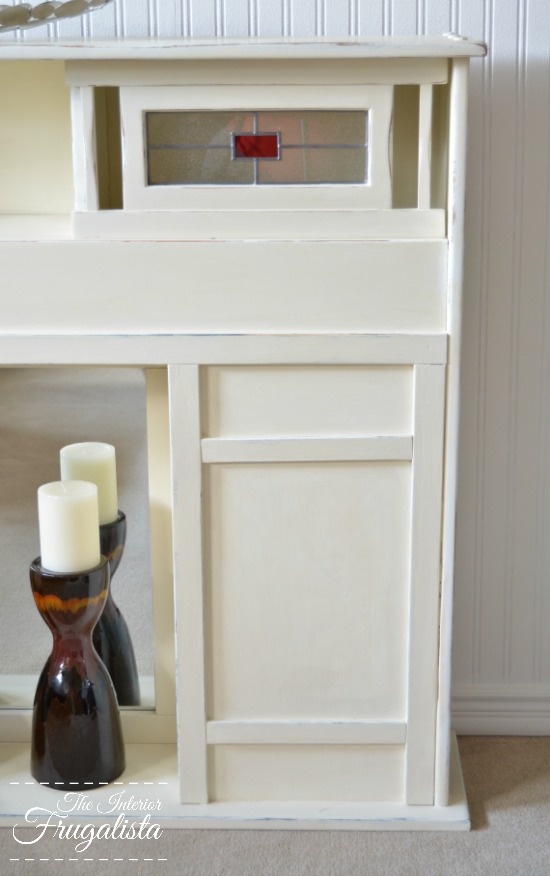
We trimmed the fireplace to replicate the trim around the sliding doors, which gives it the craftsman style. We also installed a mirror on the back of the fireplace opening to reflect whatever is displayed in the opening.
This post contains affiliate links so you can see what products I used or recommend for this project. As an Amazon Associate, I earn a small commission from any qualifying purchases at no extra cost to you.
Faux Fireplace Insert Ideas
I've included some ideas for what to display in the faux fireplace opening below.
- Display a trio of ceramic pillar candleholders like pictured above.
- A pretty option to reflect in the mirror at night is a set of multiple flameless candles in varying heights on a set and forget timer.
- Another option is installing an electric fireplace insert.
- I found these rustic wood log tealight holders options.
- Or you could make a version of our DIY real stacked log candle holder insert pictured below.
Now that you see the potential for these MCM bookcase headboards and what you can display in the faux fireplace opening, let's get started on how to make it.
How To Repurpose A Vintage Headboard Into A Faux Fireplace
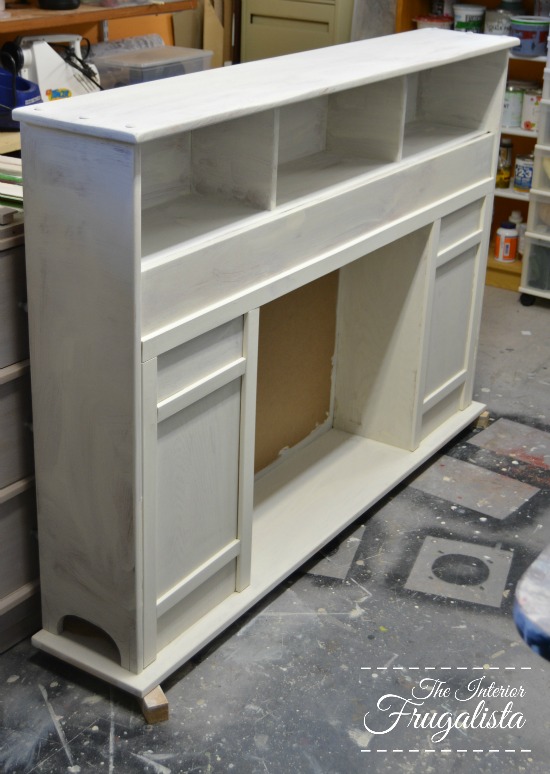
The first step in the headboard to fireplace conversion is building the firebox opening.
Step 1 - Building Firebox Opening
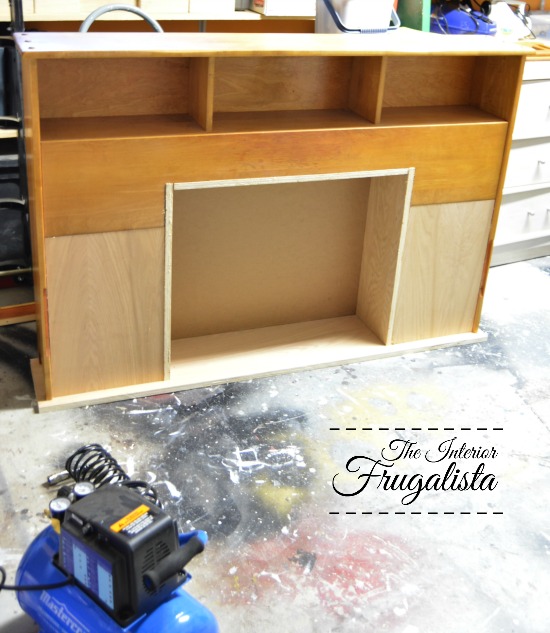
- Mark the center of the double headboard.
- Measure 14-inches on either side of the center mark and draw a vertical pencil line on both sides, making the firebox 26 inches wide.
- Carefully cut the headboard with a jigsaw and use a straight edge as a guide.
- Attach a 3/4-inch plywood base to the bottom of the headboard the same length and width as the existing top on the headboard.
- Frame the firebox opening with 1/2-inch plywood starting on each side and then the top. Attach the boards to the headboard and new base with metal flat mending brackets and L-brackets (pictured in step 2).
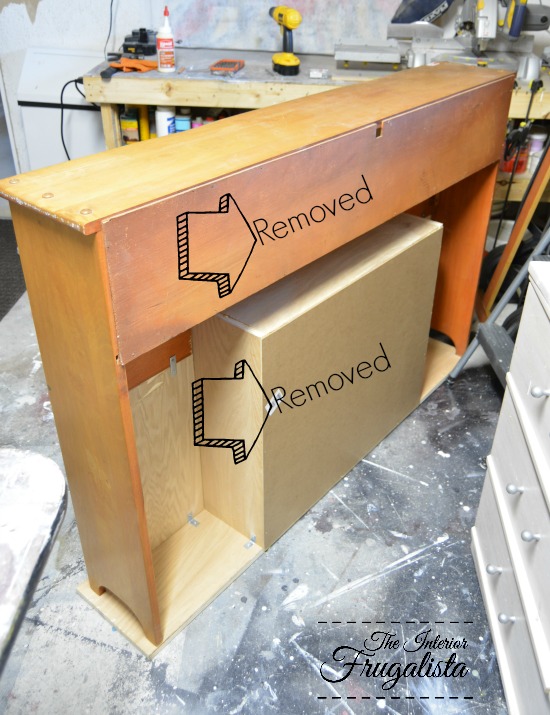
- Attach 1/2-inch plywood on either side of the opening also with flat mending brackets and L-brackets on the backside of the fireplace (pictured in step 2).
- In the photo below you'll see we installed a hardboard back on the fireplace box. Skip this step for now because and we'll be addressing it in the next step.
Step 2 - Backboard Installation
Initially, we kept the original backboard behind the headboard cubbies and just added a piece of hardboard to the back of the firebox opening only.
Because I plan on selling the faux fireplace, we changed our minds and gave it a more professional finish by installing one large piece of 1/8-inch hardboard to cover the entire back of the fireplace.
Step 3 - Craftsman-Style Trim Installation
Now that the faux fireplace is framed, we'll trim it with craftsman-style molding to echo the trim on the stained glass sliding doors. The trim also hides all the joints.
Attach flat MDF trim to the front of the fireplace like pictured below, gluing it with wood glue and a brad nailer.
Step 4 - Prime The Fireplace Wood
Because of all the different wood finishes and to avoid sanding the original headboard, the entire fireplace is primed with my go-to primer.
Step 5 - Painting Faux Fireplace
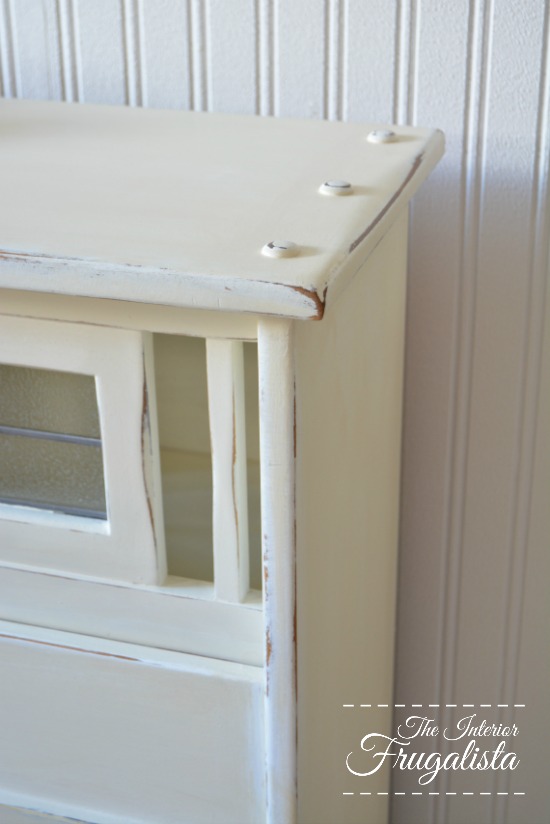
We chose to paint the headboard with Annie Sloan Chalk Paint in the color Old White. We chose chalk paint because of the lovely matte finish and it dries very quickly. It's also very easy to distress chalk paint to retain the vintage charm of the original headboard.
It was painted with two coats of chalk paint, waiting an hour between each coat. The paint was lightly sanded between coats with 220-grit sandpaper for a smooth finish.
Once the second coat of paint was dry, the paint was lightly distressed with 150-grit sandpaper along the edges and top ledge of the fireplace as pictured above and below. Distressing the painted fireplace is of course optional but it does add vintage charm.
The paint is sealed with clear wax from the Annie Sloan Chalk Paint line. Applied with a round wax brush and buffed to a matte sheen.
Alternatively, you could apply a clear coat, however, I highly recommend this satin diamond coat finish because it doesn't yellow the white paint. Or you could use a matte Annie Sloan Chalk Paint lacquer.
Step 6 - Mirrored Faux Firebox
We found a mirror that fit the opening perfectly for $17 and glued it to the back of the opening with silicone.
After the silicone was cured, MDF trim was ripped on the table saw 1 3/4-inches wide to frame the front of the mirror. It is attached with construction adhesive.
If you are DIYers like us and know your way around power tools, you can see that it wasn't too difficult to repurpose the mid-century modern headboard into a lovely faux craftsman-style fireplace.
Being a repurposed double-sized headboard, it is a smaller-sized faux fireplace perfect for a small living room, dining room, or even a bedroom. It's the perfect fireplace option for a rental!
Another faux fireplace option is the DIY faux fireplace with storage that we built for our daughter's townhouse rental.
But if you are not in a rental and don't have a fireplace in your home, here's another option for a full-size faux fireplace. See how we repurposed an 80's wall unit into a custom built-in electric fireplace with flanking bookcases for our living room.
Thanks for stopping by the Interior Frugalista today! I hope you were inspired by this repurposed mid-century modern headboard faux fireplace idea.
Almost all of our DIY ideas have step-by-step tutorials so why not get your budget DIY on and subscribe. You can also find us on Pinterest, Facebook, Instagram, and YouTube.
If you have any questions, please leave them in the comment section below or the Contact Me tab at the top to drop me an email. I love hearing from you!
If you enjoyed this repurposed headboard craftsman-style faux fireplace, I'd be so thankful if you shared it with a friend and pinned it to your favorite board on Pinterest.
I share my projects at these inspiring link parties.










This idea is awesome, Marie! I've never really had a vision for these, and have seen plenty on the side of the road. This is a great repurposing idea! Pinned!
ReplyDeleteThanks Lora! The stained glass sliding doors was my inspiration for the fireplace. I have another similiar headboard set waiting on the queue for Fall.
ReplyDeleteI like your idea of turning the headboard into a fireplace. It is so cool.
ReplyDeleteThank you Debra! I was tickled pink with the results because it turned out better than I had envisioned. I was thrilled when a young family purchased it for their rental home to enjoy during the holidays.
DeleteYou did a beautiful job, It looks so much nicer as a fireplace. And your logs are gorgeous.
ReplyDeleteThank you very much, Anita! It sold really quick too. I'm on the hunt for another MCM headboard to do another.
DeleteAmazing
ReplyDeleteThank you very much Michele!
Delete