How To Turn An Old Door Into A Headboard
It all started with a visit to a local salvage yard one afternoon with a friend. Way at the back of the store behind a pile of interior doors, we came across two very heavy vintage 5-panel doors. I looked at my friend and said, "girl, I'm going to show you how to turn an old door into a headboard. But the challenge was how to get those two gorgeous doors home.
Repurposed Vintage Door Farmhouse Headboard
We arrived in a compact car but we knew if we didn't take those doors right there and then, they'd be gone in no time. The very patient staff member shook his head when he saw the Toyota Corolla we planned on stuffing those doors into.
Two middle-aged women on a mission, there was no such thing as it can't be done. Through the trunk, over the seats, with a good portion of the doors hanging out the tethered trunk, we got them in. Good thing I'm vertically challenged because the doors hung over my head as I slouched in the passenger's seat.
We must have been quite the sight driving down the freeway. With the wind in our hair and accomplishment coursing through our veins, we giggled and chatted all the way home. Excited about the prospect of our amazing repurposed vintage door farmhouse headboards.
Here's my heavy solid core door waiting to be transformed. Can you imagine two of these in the back of a Toyota Corolla? I chuckle every time I think about the look on that man's face at the salvage yard.
It sat in the basement until spring when we could finally take it outdoors and get to work. What do you think?
What You'll Need To Make It
This post contains affiliate links so you can see what products I used or recommend for this project. As an Amazon Associate, I earn a small commission from qualifying purchases at no extra cost to you.
Supply List
- Solid Core 5-Panel Door (salvaged)
- 3/4" or 1" Oak Plywood
- 3-inch Crown Moulding
- 1-inch Decorative Trim
- 4 each 2x4 Lumber
- Wedgewood Gray Latex Paint
- Sturbridge White Paint
- Clear Wax
- Dark Wax
- Wood Glue
- 1 1/2-inch and 4-inch Wood Screws
- 220-Grit Sandpaper
Tool List
- Power Drill
- Pneumatic Nail Gun
- Table Saw
- Miter Saw
- Level
- Stud Finder
Before we get into the nitty-gritty of how to make the DIY Headboard, almost all of the DIY projects shared here at Interior Frugalista have step-by-step tutorials so why not get your budget DIY on and subscribe. You can also follow us on Pinterest, Facebook, Instagram, and YouTube.
Here's How To Make It
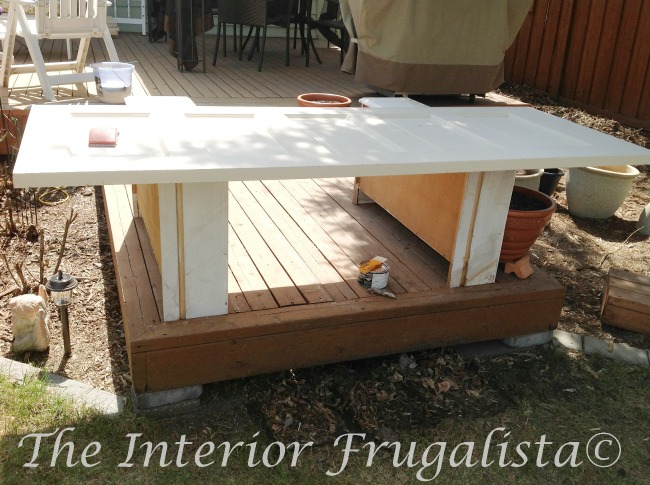
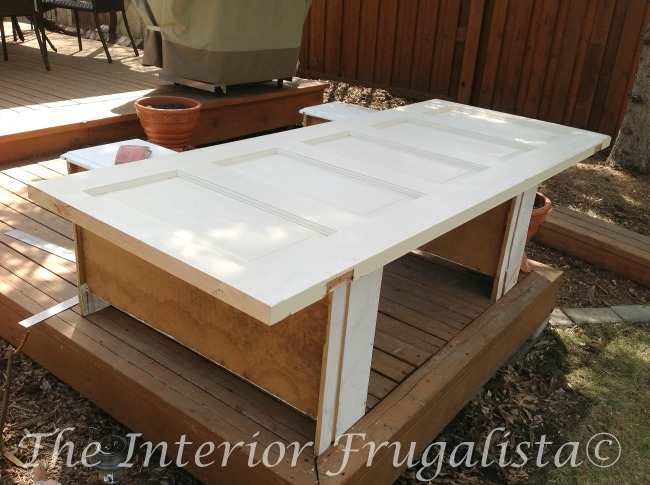
Do you like my makeshift sawhorses? I didn't feel like hauling the ones from the basement workshop outside so these leftover drawers from the Twin Headboard Bench came in handy.
We'll start the tutorial by trimming the door to fit a queen-size bed.
Step 1 - Trim Door To Fit Queen Size Bed
To accommodate a queen size bed, cut the door to 67-inches long. If you would prefer not to have an overhang on either side of the mattress, cut the door 65-inches long instead.
Pro-Tip
Trim the door on both ends so it looks symmetrical on each side.
Step 2 - How To Frame Door For Mantel Ledge Headboard
To accommodate a crown molding mantel ledge on the top, the depth of the door must be increased by 3-inches. To do this screw a 2 x 4 on either end of the door and along the top (pictured below). We'll discuss the french cleat for hanging the headboard on the wall in the next step.
Step 3 - How To Build French Cleat
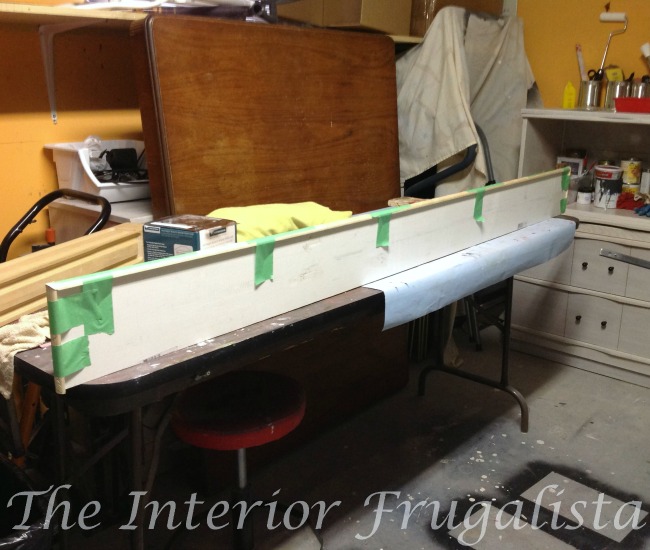
The strongest way to mount the heavy solid core door onto the wall is with a French Cleat. To build one set the table saw to cut at a 45° angle. Rip two 2 x 4s down the middle of the lumber. One cleat will be mounted on the wall and the other on the headboard.
For the one mounted on the headboard, attach it to the back of the door so the angle is pointed downward toward the bottom of the headboard. Make sure the cut is facing inwards towards the back of the door (pictured above).
We will talk about the wall cleat installation further down in the post.
Step 4 - Adding Crown Moulding To Headboard
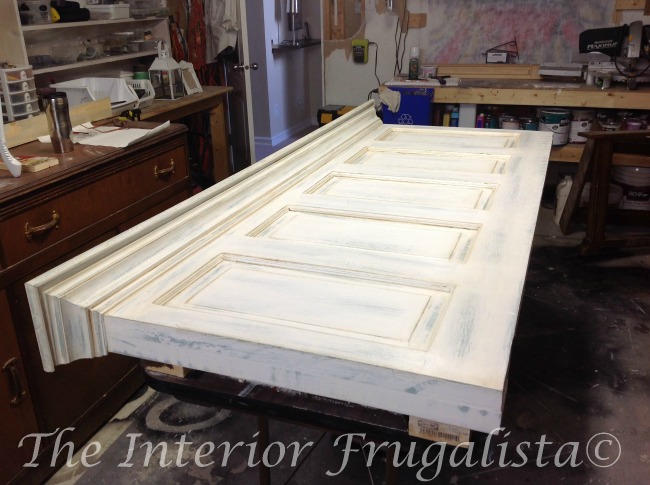
To build the mantel shelf on the top of the door install 3-inch crown molding with brad nails (much like you would on the top of a cabinet (pictured below).
Step 5 - How To Add Mantel Ledge On Headboard
In this step, we'll add a mantel ledge above the crown molding on the headboard (pictured below).
- Cut a piece of 3/4-inch or 1-inch oak plywood to measure 5" x 73" (1/2-inch larger than the top of the crown on the sides and front.
- Dress up the raw edges of the plywood by attaching 1-inch decorative trim, cutting the corners at a 45° angle. Glue and brad nail in place.
- In the photo above you'll notice the trim isn't flush on the bottom because we used 3/4-inch thick plywood. That's okay, your crown will fit snug inside and it won't be noticeable (pictured below).
Attach the plywood top onto the crown molding (pictured above) with wood glue and brad nails. Fill all the screw and nail holes with wood filler and sand smooth before moving onto the next step.
Step 6 - Base Coat Of Paint
It's hard to tell in the photo below but the headboard is painted a Wedgewood Gray color (the same color as the bedroom walls) with an eggshell Behr Ultra Primer In One Latex Paint. The paint was wet when I took the photo which is why it looks glossy.
Step 7 - White Distressed Top Coat Of Paint
Next, I brushed a thin coat of Homestead Paint Company Milk Paint in the color Sturbridge White. You don't have to use milk paint like I did, a white chalky paint or latex paint is fine too.
Thin the paint with water so you have more of a paint wash rather than a thick coat of paint. We're going to give the headboard a shabby chic distressed look where the Wedgewood Gray shows underneath (pictured below).
Once the white paint is dry, distress the edges where it would naturally wear over time with 220-grit sandpaper. Reveal as much or as little of the Wedgewood Gray underneath as you like.
Step 8 - Protecting The Finish
To protect the paint I applied a coat of Annie Sloan Chalk Paint clear wax with a round wax brush. To give the headboard an aged patina, I immediately applied dark wax along the edges of the recessed panels and the decorative trim. Remove any excess wax with a lint-free rag.
Step 9 - Install French Cleat On Wall
Now it's time to mount the other French Cleat onto the wall.
- Mark the wall at the center of the mattress to find the center point.
- Mark the wall at the height of the top of the mattress.
- Note: You want the bottom of the headboard to sit an inch or two below the mattress. Mark the measurement on the wall with a piece of tape.
- Once you've determined the placement of the headboard, measure from the bottom of the headboard to the cut point of the French Cleat installed on the headboard.
- From the top of the tape that you placed on the wall in #3, draw a line across the wall using a level to keep it straight.
- Using a stud finder, find the studs and mark them with a pencil just above the line from #5.
- Note: This is where you will need a second set of hands.
- With the 45° angle on the French Cleat facing upwards towards the ceiling, line up the back of the cut with your mark on the wall.
- Attach the French Cleat with 4-inch wood screws on each wall stud (as pictured above). Ask your helper to stick around for the next step.
Step 10 - Installing Wall Mount Headboard
Essentially the two cleats fit into one another to form a strong hanger. You will never have to worry about that heavy door crashing down on your head during the night.
Enjoy your new headboard!
I've had many readers enquire about the wallpaper behind the headboard. It's actually an allover wall stencil and you can find links to the stencil and the tutorial here in my 12 Helpful Tips On How To Stencil A Wall post. Here's a link to the Benjamin Moore Wedgewood Gray HC-146 wall color as well.
I'm so happy my friend and I stumbled upon those old 5-panel doors that afternoon and that we managed to fit them in her little Toyota Corolla.
Here are some more ideas for repurposed doors that you may like. I turned a much smaller 5-panel door (purchased at the same salvage yard) into an Outdoor Garden Flower Planter for our deck. We also salvaged old wooden louvered doors into a Bi-Fold Door Privacy Fence for our backyard.
Thanks for stopping by the Interior Frugalista today! I hope you were inspired by this repurposed vintage door idea. If you have any questions, please leave them in the comment section below or the Contact Me tab at the top to drop me an email. I love hearing from you!
If you enjoyed this DIY Headboard idea, I'd be so thankful if you shared it with a friend and pinned it to your DIY Headboard Ideas or Repurposed Door Ideas board on Pinterest.

I share my projects at these inspiring link parties.


I have 5 doors, guess I will be busy.
ReplyDeleteHow lucky! A good vintage solid core wood door is hard to find for a decent price around here. Happy building! If you have any questions about building the headboard, don't hesitate to email me (link in the Contact Me tab).
DeleteThis is fabulous, and what a great upcycle. I'm excited to share this post with my readers - Pinned and thanks for sharing.
ReplyDeleteThank you so much, Chas, appreciate the pin and shares too! Have a great weekend 😊
DeleteI have a great love for projects made from old doors (including cabinets), and shutters. This headband is beautiful! The paint job matches the wall paper perfectly, and the edging that you added to the top to house goodies was genius! Great upcycle! And great resource. Picked it as one of my features at this week's Snickerdoodle Create Bake Make Link Party.
ReplyDeleteAlexandra
EyeLoveKnots.com
You just made my Saturday, Alexandra! Thank you so much for your sweet comments AND the feature. 🤗 xo
DeleteSo beautiful!!! Love the crown molding detail!
ReplyDeleteThanks Sarah! We still love our vintage door headboard as much as the day we made it.
DeleteLove it I have 2 old vintage doors that came out of my 95 year old house I will be trying this with one of them the crown moulding really looks nice
ReplyDeleteHow wonderful to have such old doors out of your own home to use for the headboard. Have fun building it, Linda! If you have any questions during the build, I'd be happy to help. I'd love to see a photo when you're finished.
DeleteDo you have any video of painting the door? Could I use chalk paint for both the under-color and the wash? Thanks!!
ReplyDeleteHi Lisa, sorry, I don't have a video of painting the door. You absolutely can use chalk paint for both, in fact I recommend you do!
DeleteI laughed when you said you got those doors in a Corolla. A girlfriend and I did something similar one time when the guy working at the store said it couldn't be done. We giggled all the way home. Love the headboard.
ReplyDeleteNever under estimate the power of a woman, right! As you were giggling all the way home, didn't it kind of feel like Thelma & Louise without going over the cliff? LOL
Delete