Easy Beginner Wood Tile Mosaic Wall Art For Fall
Have you started decorating for Fall? While I haven't yet, my thoughts have been on ideas for budget-friendly fall decor.
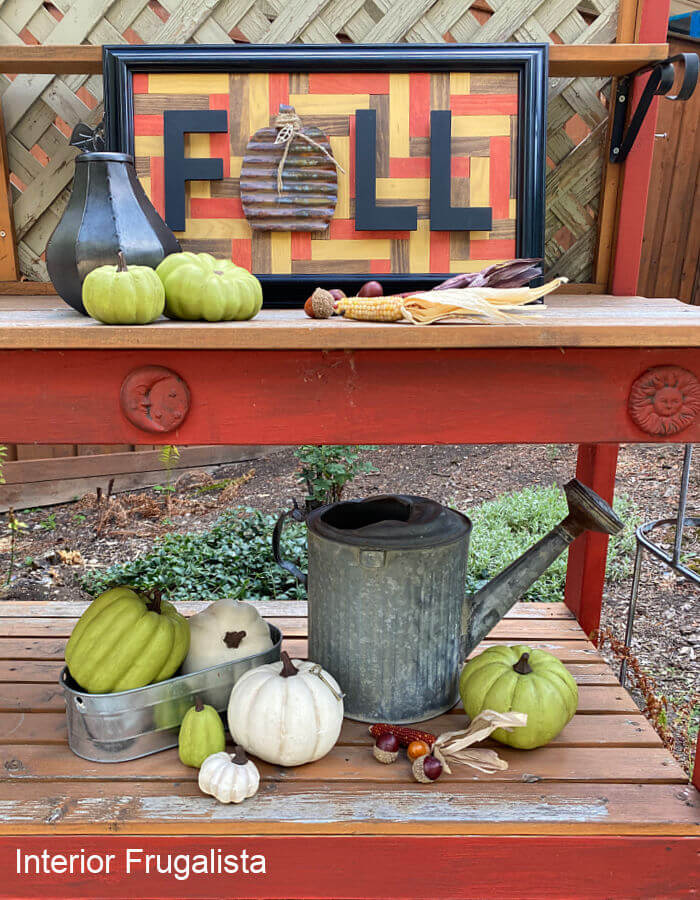
As always happens, a trip to Goodwill got the creative juices flowing. Today I'm sharing an easy beginner wood tile mosaic wall art idea for fall. It has a simple geometric pattern that requires no intricate mitered cuts.
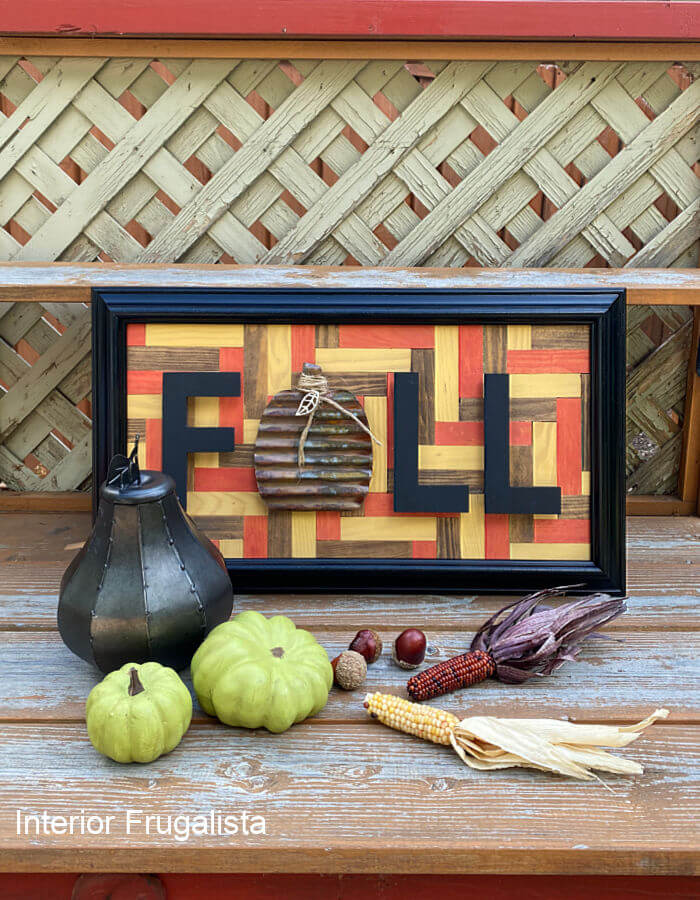
Rustic Geometric Recycled Wood Tile Fall Wall Art
The motivation for making the geometric fall wall art is that today is our Int'l Bloggers Club challenge and the theme this month is Walls And All.
The inspiration came from a bag of wood tiles found at Goodwill for $6.50 and a large rectangular picture frame.
I was thrilled to stumble upon the bag of wooden tiles, it's not like you find those every day! Alternatively, you could recycle Jenga game tiles. Using precut tiles is so much easier than having to cut blocks of wood.
Making fall wall art of this size and caliber costs a fraction of what you'd pay retail, making this a budget-friendly fall decor idea. The rustic mosaic fall sign could be hung either indoors or in an autumn vignette on a front porch.
I'm so glad our walls and all challenge was this month because it gave me just the motivation I needed to dig myself out of the beach sand to focus on fall.
If you haven't heard of our Int'l Bloggers Club, we are a group of blogging friends from around the globe who come together on the third Monday of every month to share a themed DIY project.
We have members from Spain, South Africa, Australia, the USA, and Canada. I've included links to my uber-talented friend's Walls And All ideas further down in the post.
The theme for our last challenge was FurEVER. The goal was to create a pet craft in honor of World Dog Day on August 26th. I turned an antique chair seat into a fun Time For A Walk Dog Leash Holder.
What You'll Need To Make It
Here's what you'll need to make the wood tile mosaic fall wall art. The supply list contains affiliate links so you can see what products I used or recommend for this project. As an Amazon Associate, I earn a small commission from qualifying purchases at no extra cost to you.
Supply List
Deep Picture Frame (thrift store)
Small Wood Tiles (or Jenga Game Tiles)
Hardboard
Brown Gel Stain
Autumn Red Waterbased Paint
Mustard Yellow Waterbased Paint
Black Waterbased Paint
Satin Black Spray Paint
Behr Chalk Decorative Clear Wax (or Acrylic Clear Coat)
Wood Glue
E6000 Glue
5 1/2 inch MDF Font Letters (F and 2 L's)
Corrugated Galvanized Tin OR Metal Pumpkin Decor
14 1/2-inch Black Plastic Spacers
Natural Twine (dollar store)
Small Wood Leaf
OOK Glazier Points
Retractable Knife
Straight Edge (or square)
Tin Snips
Sandpaper For Metal
What type of picture frame should I use for the wood tile art?
Try to find a picture frame with some depth rather than one where the backing is flush with the frame, to accommodate the wood tiles. It can be one of the shallower shadow boxes or a deeper double mat style picture frame.
How To Make Wood Tile Mosaic Wall Art
The most challenging part of making this particular mosaic wood tile wall art is deciding the stain color pattern. The mosaic pattern itself is a simple one that takes no time to put together.
Let's begin the tutorial by cutting the hardboard backing for the wood tiles to be mounted on.
Hardboard Wall Art Backing
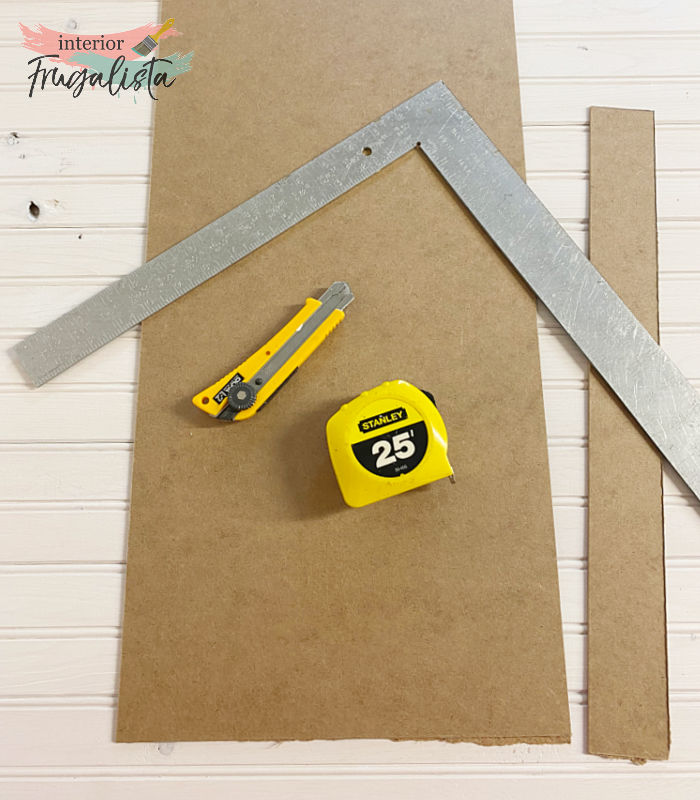
The first step is measuring the back of the picture frame and cutting a piece of hardboard to size with a sharp retractable knife and straight edge.
Paint Thrift Store Picture Frame
First, clean the picture frame, and if it's wood scuff the finish with 150 grit sandpaper to give the paint some bite. Mine is a plastic frame so I spray-painted it with two coats of satin black paint and primer spray paint.
Determine Mosaic Wood Tile Pattern
As mentioned earlier, I went with a simple wood mosaic pattern that involves no intricate mitered cuts (pictured below).
I started the pattern on the bottom left corner with full tiles to keep things square. I didn't precut any of the smaller tile pieces along the edges because those will get trimmed later.
Stain Mosaic Wood Tiles
For fear of messing up the pattern, I found it easier to keep the mosaic in place when staining each individual tile. I also used a random pattern for the colors, deciding the color for each tile as I went.
To make a red and yellow stain, I thinned water-based chalk-style paint that I had on hand. For the yellow color, I used a Golden Rod from Wise Owl Paint, leftover from the Repurposed Mid-Century Cabinet makeover.
For the rustic red color, I used Autumn from FAT Paint, leftover from the DIY Antiqued Fall Mirror. For the brown color, I liked how the Tobacco Road water-based gel stain from Dixie Belle Paint looked on the wood tiles when I made the industrial dollhouse coffee table.
To apply the stain I used lint-free shop towels. Basically giving the wood a thin wash of color so the wood grain was still visible. Then I immediately set each tile back in its place without disturbing the mosaic pattern.
Glue Mosaic Wood Tiles
By the time I finished staining the last wood tile, the rest were dry enough to jump right into the next step.
When gluing the wood tiles with wood glue, there was not much playtime before the tiles bonded with the hardboard. So it was imperative that I lined the tiles up perfectly square as I set them in place.
Starting with the first stained tile on the bottom left, I glued all the full tile pieces first to keep the pattern square. Then I glued the shorter pieces along the edges last.
Protective Clear Coat
Once the tiles were firmly in place I protected the stain with a coat of Behr Chalk Decorative Clear Wax applied with a small wax brush. The wax enhanced the stain colors.
It's hard to tell in the photo below but the waxed tiles are on the left and unwaxed on the right. I buffed the wax with a lint-free rag until it no longer felt tacky and had a lovely satin sheen.
Wood Letters
Next, I painted 5 1/2-inch MDF font letters with two coats of Raven Black FAT Paint, spelling the word FALL, minus the letter A.
The black color offers a high contrast to the autumn tile colors underneath but also echoes the color of the frame. Once the paint was completely dry, I applied an acrylic clear coat to protect the paint finish.
Galvanized Pumpkin
To replace the letter A in FALL, I added a rustic galvanized pumpkin instead. After unsuccessfully searching high and low for a readymade metal pumpkin, I decided to make one instead.
I was thrilled to find small sheets of corrugated galvanized metal at Dollar Tree. I also found a small wooden pumpkin at Dollarama to use as a template.
I traced the pumpkin shape onto the galvanized metal and cut it out with tin snips. To soften the sharp edges I sanded them with a piece of sandpaper for metal.
To decorate the pumpkin, I wrapped natural twine around the stem and thread a small wooden leaf from the dollar store through the twine.
After holding the pumpkin up to the sign it felt like it needed more. So I set out to add some instant rust to the galvanized metal pumpkin.
How To Add Instant Rust To Galvanized Metal
- You'll want to head outdoors for this step because good ventilation is an absolute must.
- Wear proper eye protection, a mask to cover your nose and mouth, and chemical safe gloves.
- You'll also need to protect your work surface with cardboard or something.
- Pour muriatic acid into a small spray bottle. I save my empty purse-size eyeglass cleaner spray bottles for crafting purposes.
- Pour hydrogen peroxide into another small spray bottle.
- Spritz the muriatic acid along the edges of the metal pumpkin.
- Next, spritz hydrogen peroxide over the muriatic acid-covered areas.
- Then watch the rusty magic happen!
- Spritz more hydrogen peroxide as needed for more rust.
- Let it completely dry in the sun.
Final Touches To Fall Wall Art
I wanted the letters and rustic pumpkin to be raised above the wood tiles. To do that I used fourteen small 1/2-inch black plastic spacers and glued them onto the back of the letters and pumpkin with E6000 glue.
Trim Mosaic Wood Tiles
While the glue on the spacers is curing, is a good time to trim the wood tiles on the hardboard.
We used a table saw but you could use a circular saw with a straight edge guide, band saw or scroll saw to trim the tiles. I wouldn't recommend using a jigsaw because the vibration may loosen the tiles as you cut.
Assemble Mosaic Wall Art
Set the wall art into the painted picture frame. If it doesn't have clips to hold the art in place, use glazier points (see supply list) from Home Depot. If you're lucky enough to have a logan point driver, use that instead. It's on my wish list to add to my tool arsenal.
Last but not least, attach the letters and rusty galvanized pumpkin to the wall art with E6000 glue. Add some weight on top for a tight bond with the tiles while the glue cures.
That my friends is an easy way for beginners to make a wood tile mosaic. I hope you are feeling inspired to give this wall art idea a try. Thanks for stopping by the Interior Frugalista today!
Almost all of our DIY ideas have step-by-step tutorials so why not get your budget DIY on and subscribe. You can also find us on Pinterest, Facebook, Instagram, and YouTube.
If you have any questions, please leave them in the comment section below or the Contact Me tab at the top to drop me an email. I love hearing from you!
If you enjoyed this Rustic Geometric Recycled Wood Tile Fall Wall Art, I'd be so thankful if you shared it with a friend and pinned it to your DIY Fall Decorating Ideas or DIY Fall Sign Ideas board on Pinterest.
Now let's see my talented friend's Walls and All ideas by clicking the links below.
Shutter Frame And Junk Birds | A Crafty Mix
Pallet Clock Planter | Birdz Of A Feather
Shu Sugi Ban Barn Quilt | Unique Creations By Anita
Moss Eucalyptus Dried Flowers Wall Art | Meegan Makes
Recycled Wood Tile Fall Wall Art | Interior Frugalista (that's me)
I share my projects at these inspiring link parties.


Brilliant upcycle Marie; those tiles sure were a great find! I love your tip to leave the tiles in place as you stain; makes it so much easier to visualize! I'll also be using your tip to put the letters on spacers - those are so handy!
ReplyDeleteThanks so much, Sara, it was fun putting this fall wall art together. So glad you found the staining and spacer tips handy!
DeleteYour fall wall art is really cool Marie. Only you can make a corn on the cob look like art. I will definitely be using the instant rust tip, can you advise where to buy the muriatic acid. You did a really great job using all those recycled materials to create your wall art.
ReplyDeleteThanks so much, Anita, it was a fun project and I'm so glad I found a use for those wood tiles from Goodwill. I still have some leftover so more wood tile projects to come. I found the muriatic acid at Home Hardware, a Canadian retailer, but I've since added a link to another source in the tutorial portion of the post.
DeleteWow, that's so pretty!
ReplyDeleteThanks a bunch Tania! I still have more tiles leftover so more wood tile projects to come. LOL
DeleteLove everything about your sign Marie. It's so perfect for Fall (see I practiced spelling it this weekend ;-) ) and that pumpkin is a wonderful addition. I've made note to be on the look out for small sheets of corrugated galvanized metal. That would come in so handy when we make miniatures.
ReplyDeleteF🎃LL, LOL! Thanks Michelle, it was a fun project to work on for our challenge this month and I'm happy to put those thrifted wood tiles to good use. I hope you can find the small corrugated galvanized sheets in SA. They sure are easy to work with for small projects! I stock piled a bunch to have in my stash.
DeleteLove, love, love how you made this, Marie!! Thank you for sharing the process and the inspiration!
ReplyDeleteThank you very much, Maya, I'm glad you like it!
DeleteYou have knocked it out of the park with your creativity! I love how you used the galvanized letters and pumpkin. Such a fun way to celebrate the beginning of Fall. I'll meet you at the beach!
ReplyDeleteThanks Meegan, I'm so glad you think so! It was fun putting this together for our challenge this month but now, back to the beach sand. LOL
DeleteI really love this. Adorable for fall. xo Laura
ReplyDeleteThank you so much, Laura, I'm glad you like my fall wall art idea! I was so glad to find a use for that bag of wood tiles from Goodwill. I still have some leftover so more tile projects coming soon. LOL
DeleteWhat a fun project. I love this so much!!!
ReplyDeleteThank you very much, Virginia! I did the happy dance when stumbling across that bag of wood tiles. So much crafting potential in that bag. I have some leftover so more tile projects coming soon. LOL
DeleteBrilliant idea! I love that you used paint and stains to really showcase the wood. Love the design too. Pinning!
ReplyDeleteThank you very much, Larissa, for your sweet comment and the pin! I had fun with those thrifted wooden tiles. I have some leftover so more wooden tile projects to come.
DeleteHi Marie! It's been a while. This project popped up in my Pinterest feed and I fell in LOVE. You're so creative. Hope you're doing well. :) xo
ReplyDeleteHi Do, so nice to see you here! Happy to hear this project popped up in the Pinterest and caught your eye. It was fun putting those thrift store tiles to good use for fall. I think this is the earliest I've done a project for fall because I'm such a full fledged summer gal. I hope you are doing well too. Hugs from Canada! xo
DeleteLove how your sign turned out Marie! Those wood tiles were a great find, and you repurposed them beautifully.
ReplyDeleteThank you very much, Tuula! Yes, I did the happy dance stumbling upon that bag of awesome crafting potential goodness. I still have some leftover so more wooden tile projects coming soon. LOL
DeleteOn my gosh Marie... you've taken 'fall sign' to an all new level! The mosaic is so cool! And you know I'm all over that tin pumpkin! Super unique!
ReplyDeleteThank you very much, Donna! I was so much fun to make. Now I'm itching to use the leftover wood tiles to make a more intricate mosaic pattern.
DeleteGorgeous! I love it. Great job!
ReplyDeleteThank you very much Rebecca!
DeleteLove this idea! You were so lucky to find these wood tiles in the first place and then you made something beautiful with it. #HomeMattersParty
ReplyDeleteIt was definitely a sweet find and can't wait to make more wood tile projects with the leftovers.
DeleteHi Marie. First of all congrats on that sweet new little grand baby boy. He is precious. This Fall sign is awesome. You my dear are so creative. Enjoy that new baby. xoxo Kris
ReplyDeleteThank you Kris, we feel so blessed to have two grandsons born within weeks of each other and we're loving the baby cuddles. Thanks also my friend for your sweet comments, I'm glad you like the mosaic wall decor. Have a great week! xoxo
DeleteI love this! It's such a great thrift store upcycle. It's a one of a kind piece only you have. So cute. I'd love for you to come share your posts on Crafty Creators Link Party, open Thursdays thru Monday nights. Hope to see you there!
ReplyDeleteXOXO,
Niki | Life as a LEO Wife
Thank you Niki, it was so easy and fun to make. See you at the CC party. 😀
DeleteCongrats! I’ll be featuring your post on tomorrow’s Crafty Creators. If you stop by & let me know you’re following me on social media, I’ll feature you across there as well. You can find my links shared on my blog. Congrats!
ReplyDeleteThank you so much, Niki, for the feature! I'm happy to be following you on your social media platforms. I hope you're having a lovely Sunday!
DeleteThanks for joining in on the fun at the #HomeMattersParty! I'm featuring your wall art this week. Hope you get a chance to drop in to take a look!
ReplyDeleteHi Allyson, thank you so much for the feature, you made my Friday!
Delete