Unique French Burlap Decoupage Pumpkins
This time of year I can't walk through a dollar store without picking up a few plastic pumpkins because they have so much crafting potential. When I bought these I had no clue what I was going to do with them.
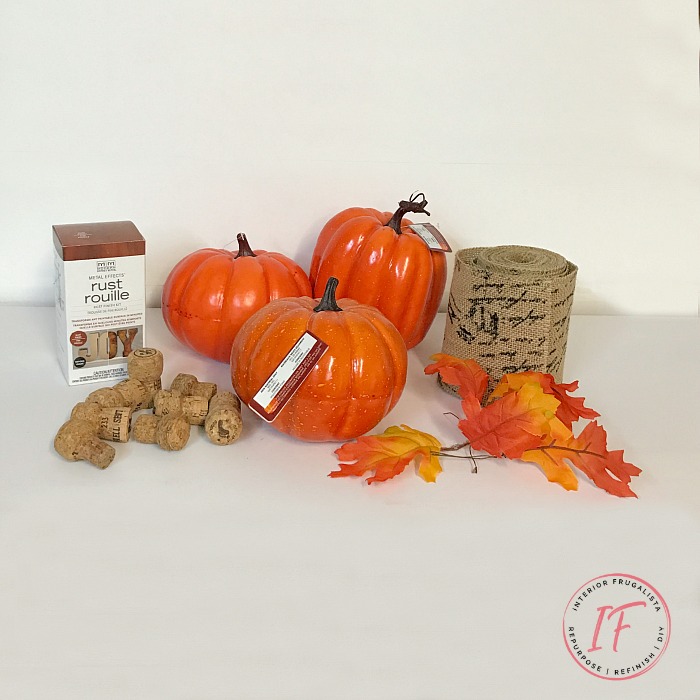
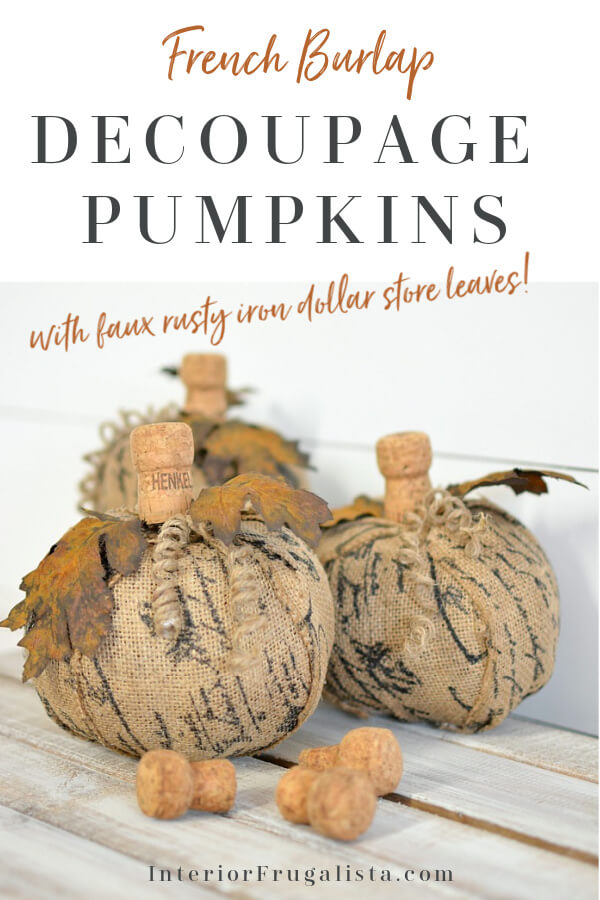
The motivation for this pumpkin craft came while rummaging through my craft bin and the idea for these unique French burlap decoupage pumpkins with rusty leaves and wine cork stems unfolded.
French Burlap Decoupage Dollar Store Pumpkins
I had completely forgotten I had the French script burlap ribbon. I also forgot I had a bag of wine corks in there too. When I saw they were stamped with a French fleur de lis, the plan for my pumpkins took on a Parisian theme
The inspiration for the decoupage pumpkins came from Beverly's Across The Boulevard frayed ribbon pumpkins.
When inspired by another's work, I like to put my own spin on it. So for my dollar store pumpkins, I used burlap ribbon to decoupage the pumpkins and made faux leaves look like rusted iron.
This was my first time using a metal affects rust kit and oh my, now I want to rust all.the.things. In fact, I used the leftovers to make unique rusty abstract pumpkin topiaries.
When picking foam pumpkins, try and find three with different shapes or sizes to make the pumpkin vignette more visually appealing.
I also purchased a Fall leaf garland from the dollar store and used some of the leaves for the pumpkins. I love how the large faux leaves look like real rusted metal (more about that process later).
I love the French farmhouse style of these decoupage pumpkins. They could be incorporated into a French Country, Rustic, Industrial, or Traditional fall vignette. They could be paired with real or other faux pumpkin styles like these handpainted pumpkins and/or DIY sweater pumpkins.
What You'll Need To Make Them
These are the supplies I used to make the decoupage dollar store pumpkins. This post contains affiliate links so you can see what products I used or recommend for this project. As an Amazon Associate, I earn a small commission from qualifying purchases at no extra cost to you.
Supply List
Faux Pumpkins (alternatives)
French Script Burlap Ribbon (alternatives)
Fabric Scissors
Sewing Stick Pins
Mod Podge
Chip Brush
Wine Corks For Crafts
Large Fall Craft Leaves
Modern Masters Rust Patina Kit
Twine
Hot Glue Gun
Here's How To Make Them
Let's get into the nitty-gritty of how to make these French burlap decoupage pumpkins, starting with how to decoupage dollar store pumpkins with burlap ribbon.
Remove the stems from the plastic pumpkins but keep them for a future craft. Next, paint the pumpkins black with two coats of acrylic craft paint so the bright orange doesn't show through the burlap. Let the paint completely dry before moving onto the next step.
- Cut strips of the burlap ribbon to fit each pumpkin vertically from top to bottom.
- Cut an inverted V or point on the top of the ribbon strips.
- Working in sections, brush matte Mod Podge onto the back of the burlap ribbon and the pumpkin.
- Set the ribbon in place and rub your hand over the burlap so it nestles into the pumpkin spines.
- Hold the ribbon in place with stick pins. Instead of ruining my good sewing pins, I keep a package on hand specifically for crafting.
- Overlap the strips of ribbon ever so slightly and tuck the pointed end into the stem hole.
- Before the Mod Podge completely dries but has a good bond to the pumpkin, remove the stick pins.
How To Rust Faux Leaves
Now for the fun part, how to make those dollar store faux Fall leaves look like real rusted metal. It's super easy and so much fun to watch the magic happen before your eyes.
Step 1 - Primer
- First, you'll want to cover your work surface to protect it from overspray.
- Brush a coat of the primer that comes in the Modern Masters Metal Effects Kit onto the front and back of each leaf.
- Let it dry for 30 minutes.
- Brush another coat of primer and let it dry for two hours before moving onto the next step.
Step 2 - Iron Paint
- Brush one coat of Iron paint on both sides of leaves.
- Allow the paint to dry for 30 minutes.
- Brush another coat of iron paint onto the leaves.
- Allow the second coat of iron paint to dry for one hour before moving onto the final step.
Step 3 - Rust Activator
This final step is where the magic happens before your very eyes!
- Spray a light coat of rust activator over the entire surface of the leaves.
- Wait five minutes and spray a second light coat then watch the magic happen.
- Let the leaves dry completely before moving onto the next step.
How To Make Twine Pumpkin Tendrils
Now we're going to make pumpkin tendrils with twine.
- Cut a piece of natural twine a minimum of 12-14 inches long. The longer the twine, the longer the tendrils, it's your choice.
- Tie the twine to the center of the faux iron leaf stems leaving two long strands hanging on each side.
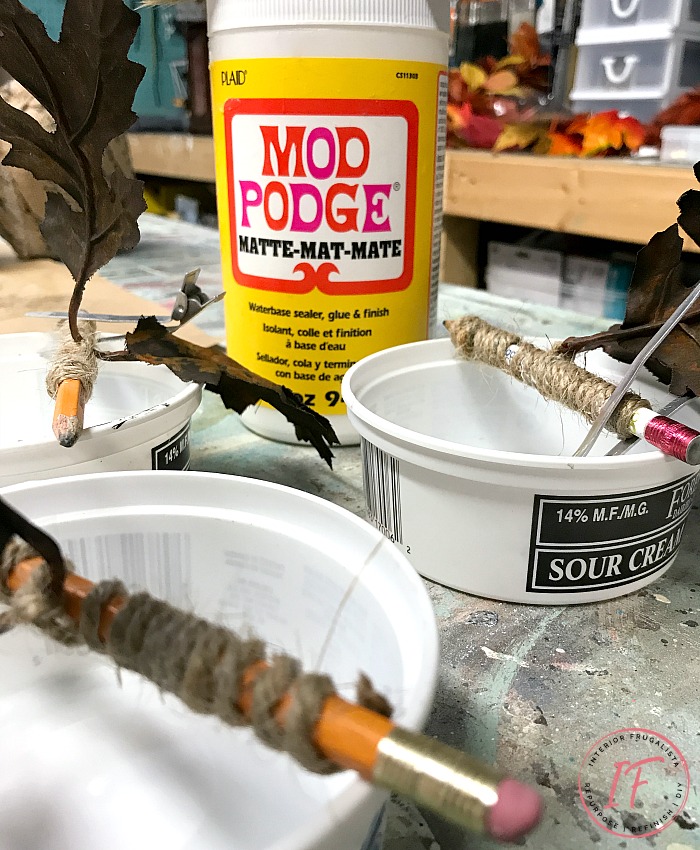
- Rub Mod Podge with your fingers over the twine and wrap it around a pencil or wooden dowel.
- Hold the tendrils in place with clips, I used hair clips that I had on hand.
- Let the tendrils dry for about 30 minutes until they start to stiffen.
- Once the tendrils are dry enough that they hold their shape, remove them from the pencil.
- Push the center of the leaf stem into the hole at the top of the pumpkins and secure it with a hot glue gun.
Wine Cork Pumpkin Stems
For the final Parisian touch to the decoupage dollar store pumpkins is the fun wine cork stems.
- With a hot glue gun secure the wine corks over the center of the leaf stems.
- Loosen the curls on the tendrils and we're done!
So what do you think? I hope you were inspired by these unique French burlap decoupage pumpkins with rusted leaves and fleur de lis wine cork stems.
For more pumpkin inspiration you may like these 12 DIY pumpkin ideas that are easy on the wallet. Thanks for stopping by the Interior Frugalista today!
Almost all of our DIY ideas have step-by-step tutorials so why not get your budget DIY on and subscribe. You can also find us on Pinterest, Facebook, Instagram, and YouTube.
If you have any questions, please leave them in the comment section below or the Contact Me tab at the top to drop me an email. I love hearing from you!
If you enjoyed this decoupage pumpkin craft, I'd be so thankful if you shared it with a friend and pinned it to your Fall Pumpkin Craft Ideas or DIY Fall Decor Ideas board on Pinterest.
I share my projects at these inspiring link parties.


Aaaaai my friend, they're beautiful. Love everything about your burlap pumpkins and those rusty leaves OMW!!! YES!!! So sad that we don't get Modern Masters here in South Africa. I've looked everywhere. They don't even ship it from Amazon. Maybe it's a good thing, coz I would rust everything I see :D
ReplyDeleteHey Michelle, thank you very much, I'm glad you like them. I'm a little nervous because they were clearing these kits out at our Home Depot store and I hope it's not because they're being discontinued. I have plans for the rest of the iron kit soon.
DeleteThese are just brimming with character Marie. I especially love how you added more depth to the leaves.
ReplyDeleteThank you Mary, I had so much fun making these, especially playing with the iron kit. I bought more pumpkins because I think these guys need some friends. LOL
DeleteMarie! these are super cute. You know I love pumpkins. woot!
ReplyDeleteThank you so much, appreciate it. I don't know you love pumpkins because I don't know who left this sweet comment as you've identified as "unknown". Would love to know who you are though. 😊
DeleteThese came out great and are so unique! Love the leaf design especially!!
ReplyDeleteThank you so much, Patti! I had so much fun with the leaf design that I'm working on another project using the rust patina kit. LOL
DeleteI love these Marie! The burlap is beautiful. I am so sorry to hear about your mother-in-law. I will keep you and your husband in my prayers :-)
ReplyDeleteThank you so much, Christina for your sweet comment and prayers, they are much appreciated 🤗
DeleteThese look great, Marie! I'm thrilled that my frayed ribbon pumpkins inspired you!
ReplyDeleteI read your weekly newsletter and I want to offer my condolences to you and your family.
Thank You for inspiring me with your pretty frayed ribbon pumpkins. I would have completely forgotten about the French script ribbon and wine corks in my stash had it not been from seeing yours. Thank you for your condolences, it means a lot. xo
DeleteHi Marie!
ReplyDeleteThese are too cute! And those rusty leaves! Your French burlap ribbon was perfect for the pumpkins. Thanks so much for sharing at Homestyle Gathering!
>>> Kim
Thank you so much, Kim! They were fun to make and what can I say, I love anything with a French vibe.
DeleteHopping by from the Over the Moon link-up. Such darling pumpkins with all the texture going on. Love the idea of the cork stems. You are a clever gal!
ReplyDeleteWelcome, I'm so glad you popped over for a visit 😊 The pumpkins were such fun to make, especially turning the dollar store leaves into rusty iron. Thanks for stopping by!
ReplyDeleteMarie - of course I had to visit when I saw "french" and "pumpkin" in the same sentence. They are darling and so unique. Thanks for sharing all the steps and demystifying the process for us. Peace to you right where you are. -michele
ReplyDeleteLOL, a girl after my own heart - my eyes perk up with the words french and pumpkin too! Thank you so much, Michele appreciate your kind words and the visit 😀
DeleteHi Marie!
ReplyDeleteI love these little French decoupaged pumpkins. The rusty iron leaves are such a clever touch, and I love the cork stems. You're one of my features this week at Homestyle Gathering. Thanks for sharing at the party!
>>> Kim
So glad you liked my pumpkins with rusty leaves, Kim, and thank you so much for the feature 🤗
DeleteOh these are darling Marie - what a great idea to use corks for the stems! We're swimming in corks around here, but that never would have crossed my mind. Thanks for the brilliant inspiration! 💗
ReplyDeleteThank you very much, Barbara, I'm glad you like the decoupaged pumpkins! I was glad to finally use up some of my cork stash because like you, I'm swimming in them too. LOL
DeleteMarie, I simply adore these pumpkins! Cutting the strips to a V at the top helps keep the decoupage tight and flat. Great idea. I love the leaves. It's a long process - with all the layers of paint - but well worth the effort. A vignette with these pumpkins would be stunning. AND, I have wine corks for the stems! It's a win-win.
ReplyDeleteThank you very much, I'm glad you like the decoupage pumpkins and found some of the tips helpful. The rusty leaves do seem like a long process but its super easy. I did each paint layer while working on the decoupage and had both finished at the same time. Yay, have fun making your wine cork stem pumpkins!
DeleteThese are absolutely adorable! And I already have some rusty metal leave that I could use instead of making them. Pinning and can't wait to get to the Dollar Store!
ReplyDeleteAwesome, have fun making your decoupage pumpkins!
DeleteThanks for the pin and share, Marilyn! xo
ReplyDeleteYour pumpkins look so unique using that iron technique! I've never heard of that kit.
ReplyDeleteI like how you made the tendrils. What would we do without our Mod Podge?! Pinned.
Hi Allyson, oh you must try the metal effects kits, they are so much fun! The oxidized copper one is fabulous too. Thanks for the visit and the pin!
DeleteGreat fall project.
ReplyDeleteThanks, I'm glad you like them!
DeleteAmazing and so perfect for fall.
ReplyDeleteThank you very much, Michele, they were a fun project for Fall.
DeleteMarie, these are simply FABulous! very elegant - and hey, i love how you've basically just given us all yet another reason to open MORE wine bottles so we can save the corks for crafting! :D they work perfectly as pumpkin stems! (i may try to pair those with my sweater pumpkins for a new look.... thanks for the inspo!) ~ deb @ homewardFOUND
ReplyDeleteThank you so much, Deb, I'm glad you like them! Girl, that's my excuse for keeping the wine fridge stocked. LOL Have fun making your pumpkin sweaters and happy to have inspired.
DeleteMarie,
ReplyDeleteI love your pumpkins and can't wait to make some for me. Congratulations, you are being featured at Over The moon Linky Party. I hope you stop by. https://www.eclecticredbarn.com/2020/08/over-moon-linky-party_16.html
Hugs,
Bev
Hi Bev, thrilled to return from vacation and see the feature, thank you so much! xo
DeleteWhat a great DIY Marie! I pinned so I can go back and try to make these later. I am featuring you on Charming Homes and Gardens on Wednesday. Thanks for sharing!
ReplyDeleteThank you so much, Kim, for the feature and the pin! xo Have fun making the burlap pumpkins.
DeleteThese are just the cutest!!!! Love them! Thanks for sharing the inspiration at Charming Homes & Gardens! ~ Kristin | White Arrows Home
ReplyDeleteThank you, Kristin, I'm glad you like them!
DeleteMY soul, I thought I'd never get to the bottom to leave a comment! It's nice to see so many people LOVE your burlap pumpkins as much as I do! Guess what?! You are being featured again on Farmhouse Friday too! It was the corks! That put it over the top for me. But that painting technique on the leaves was super cool too. pinned!
ReplyDeleteTHANK YOU, thank you Cindy for the feature and the pin! I'm so glad you like my decoupage pumpkins with wine cork stems. See you at the party! xo
DeleteMarie I love these pumpkin and the corks and the leaves! So glad you shared your post with us and I happy to feature it this week at our Tuesday Turn About Link Party.
ReplyDeleteI'm thrilled to hear my french pumpkins are being featured this week. Thank you so much, Michelle! xo
DeleteI'm featuring you next week - thanks for sharing with us at the To Grandma's house we go link party!
ReplyDeleteI'm thrilled Tarahlynn, thank you so much! xo
DeleteThese are absolutely fabulous Marie. Happy Friday and have a great weekend. xoxo Kris
ReplyDeleteThank you very much Kris, I'm glad you like them. Wishing you a great weekend as well. xoxo
Delete