DIY Faux Concrete Bird Bath Finial
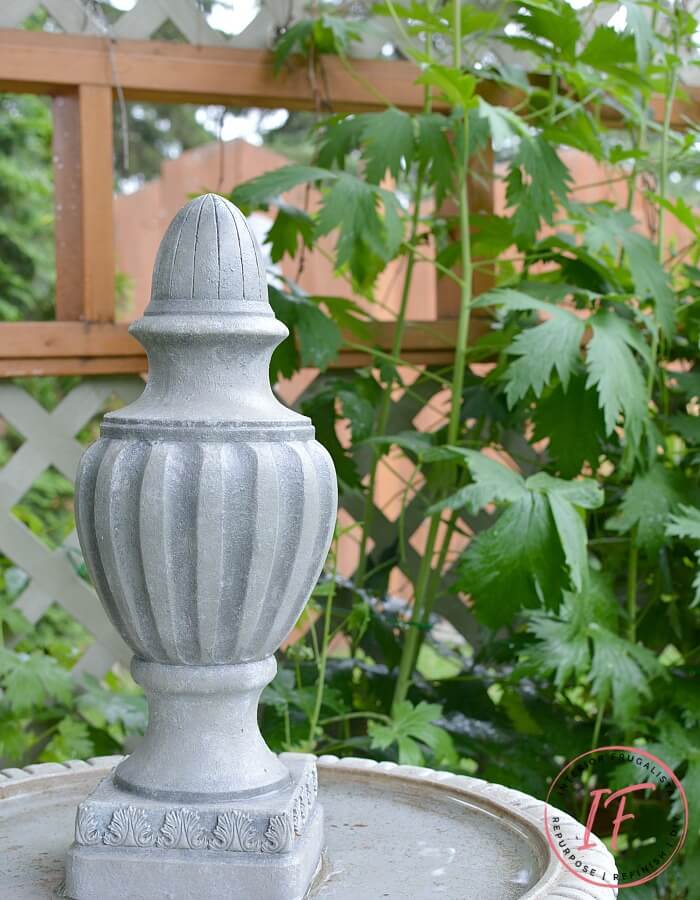
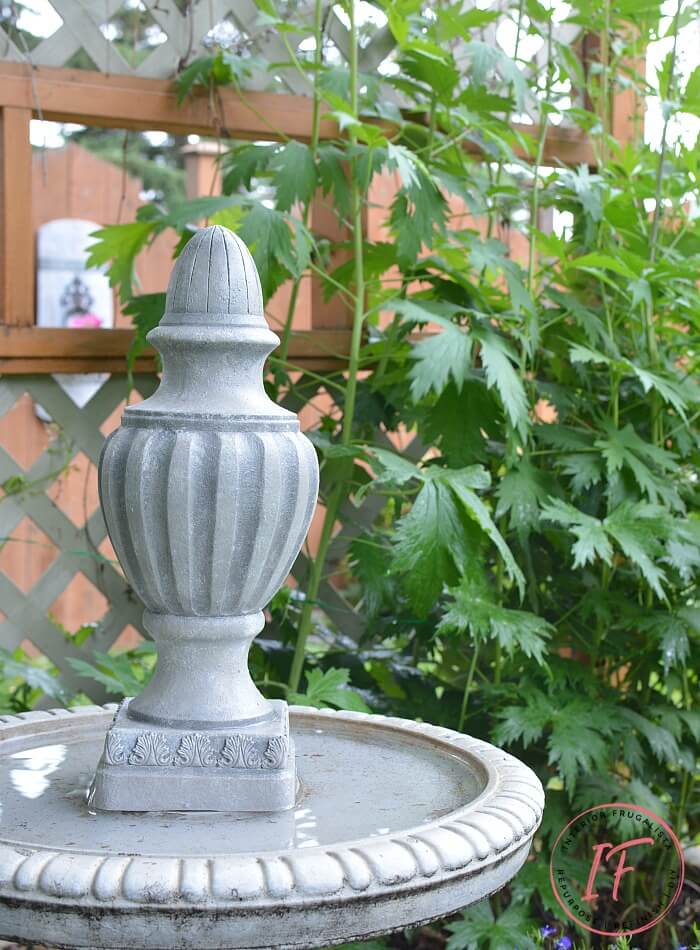
Would you guess it's a fake? When your concrete birdbath topper cracks and you have a resin finial collecting dust in the basement, well the two just seemed meant for each other. After layers of chalk paint, one would never know it's a faux concrete birdbath finial and I'll show you how easy it was to replicate.
DIY Faux Concrete Bird Bath Finial
We love our concrete birdbath and so do the numerous flocks of feathered friends that visit it daily. I find great joy sitting on the deck with my morning coffee watching the birds splashing about in the freshwater.
But unfortunately, the bird statue that sat atop our concrete bird bath for twenty years cracked and looked worse for wear.
I promise this isn't the normal state of the water in our birdbath. I clean it daily or at least every other day and fill it with fresh water.
The resin finial pictured below that has been on a shelf in the workshop for several years came to the rescue. Why spend big bucks to replace the birdbath topper when a budget-friendly option is sitting right under our noses.
I figured if I could replicate the finish on the concrete birdbath with layers of paint, it was worth a try transforming the resin finial as a replacement bird bath topper.
This is what our birdbath looked like before with the cracked concrete bird topper.
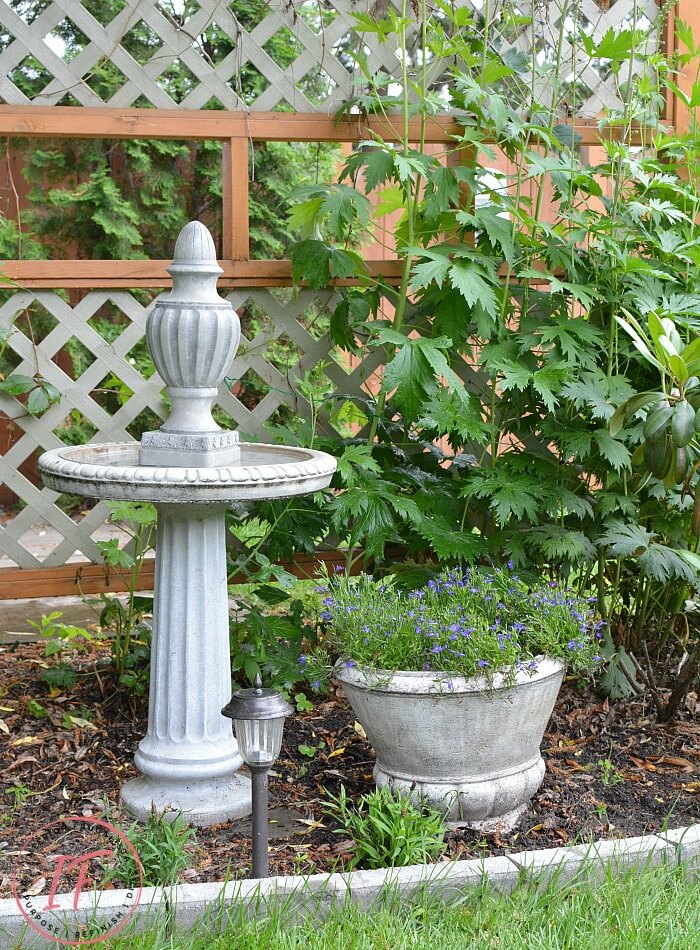
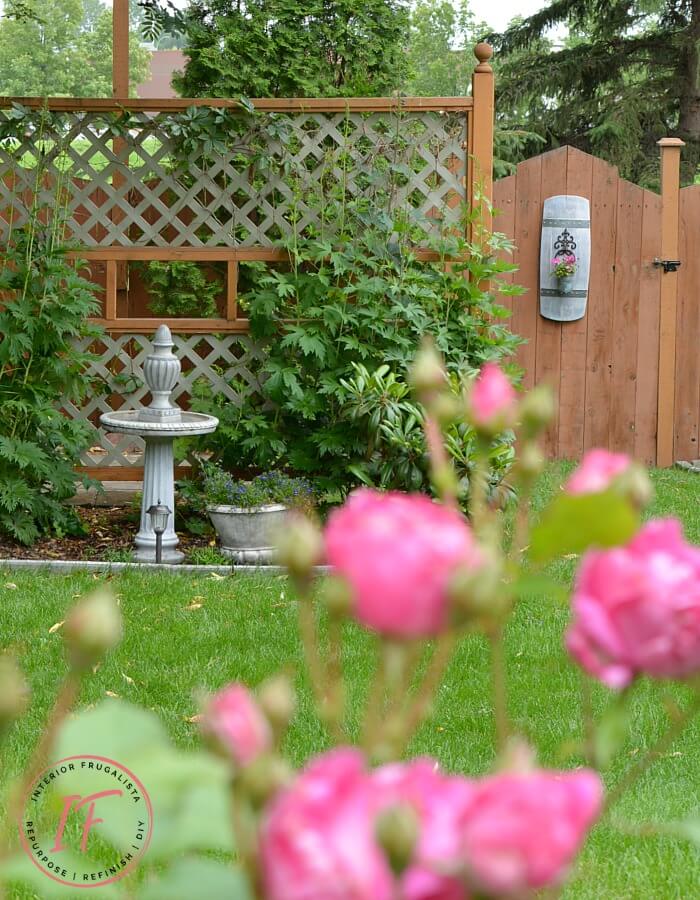
And here it is now with the fake concrete finial birdbath topper. The poor delphiniums behind it are so late to bloom thanks to all the rain we've had this summer. Once they bloom, the birdbath will be surrounded by pretty deep purple flowers.
Don't worry, I didn't get rid of the damaged concrete bird with all its vintage charm. It now adorns our rose garden and looks perfect in its new spot.
Before we get into the nitty-gritty of how to turn the resin finial into a faux concrete birdbath topper, almost all of the DIY projects shared here at Interior Frugalista have step-by-step tutorials so why not get your budget DIY on and subscribe. You can also follow us on Pinterest, Facebook, Instagram, and YouTube.
Here's How I Did It
This post contains affiliate links so you can see what products I used or recommend for this project. As an Amazon Associate, I earn a small commission from qualifying purchases at no extra cost to you.
Wack Off The Feet
In order for the resin finial to be mounted on the birdbath, the feet needed to be removed so it sits flush with the birdbath basin. To do that wallop them off with a hack saw. The fine resin dust particles are toxic so I headed outdoors and wore a mask and protective glasses to cut them.
How To Make Resin Look Like Concrete
As I mentioned earlier, I used layers of chalk paint to get the look of concrete but any paint that adheres to plastic, like multi-surface craft paint, will work.
I brought the heavy concrete basin from the birdbath indoors to use as a guide when replicating the colors. I used whatever grey chalk paint I had on hand.
Paint Layer Number One
The first paint layer is Annie Sloan Chalk Paint in the color French Linen. It took two coats to completely cover the original green finish.
Paint Layer Number Two
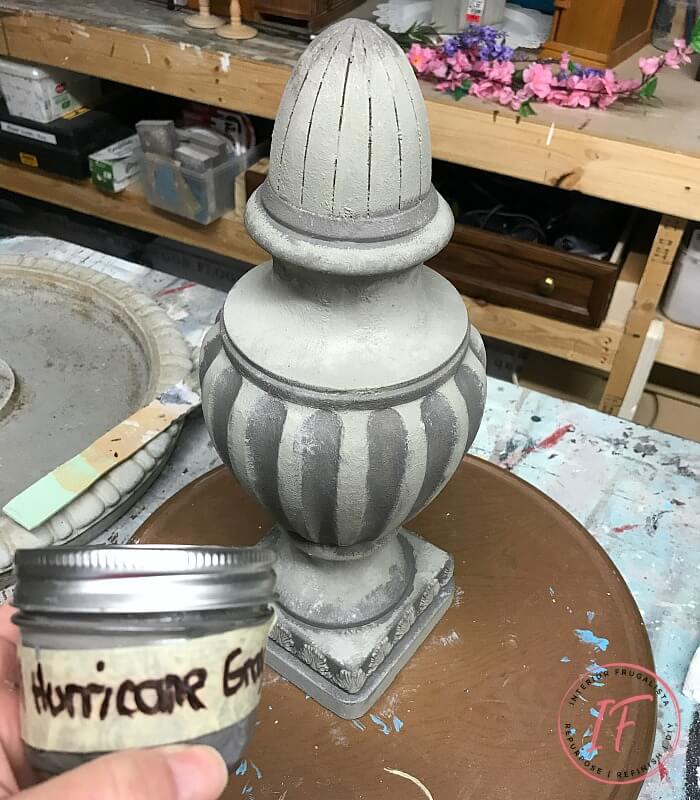
To add depth to the recessed areas of the finial, I painted them a darker Country Chic Paint Hurricane Gray color applied with an art brush.
Paint Layer Number Three
The third paint color is a lighter FAT Paint Company Pewter Gray that echoes the lighter grey in our concrete birdbath. Applied with a large round tip stencil brush much like when stenciling wood.
To do this offload most of the paint onto a paper towel first and then pounce in an up and down motion around the details and outer edges of the finial. Pouncing the paint on also adds a little texture.
Paint Layer Number Four
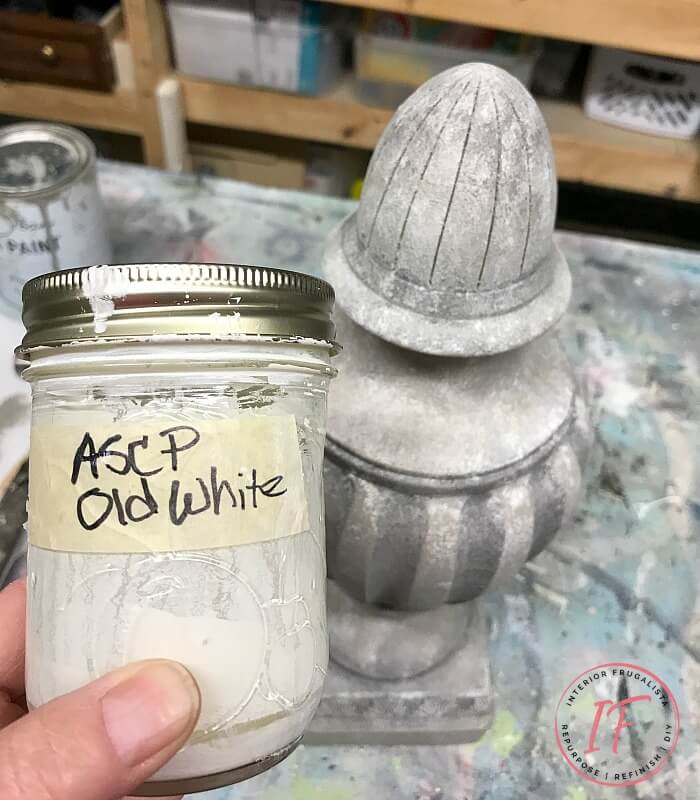
With a warm white Annie Sloan Chalk Paint in the color Old White, again pounced with the stencil brush where it would naturally weather outdoors from the elements. Again, using our concrete birdbath basin as a guide to gauge where to apply the lighter color.
Paint Layer Number Five
Last but not least, I went back in with the French Linen color to blend all the colors. This warm grey is the most predominant color on our concrete birdbath. To blend the colors dampen the brush with a handy mist bottle and lightly pounce the brush.
There are no rules when painting layers of color. Let your intuition be your guide and if you added too much color in one area, go over it with another until you achieve the look you want.
Protect The Paint Finish
Let the paint dry overnight before spraying four light coats of exterior-rated matte clear coat, waiting at least an hour between coats.
Mount Bird Bath Topper
While the birdbath basin was indoors, I mounted the faux concrete finial with clear waterproof silicone caulking and let it cure 48 hours before taking it outdoors to set on the birdbath pedestal base.
It's been raining cats and dogs for weeks and so far the paint finish is holding up beautifully. I love how the finial adds more height to the birdbath. Do you see the Barrel Stave Flower Pot Holder hanging on the gate?
I hope the faux concrete resin birdbath topper has inspired you to think outside the box for creating faux concrete garden decor. Thrift stores are bursting with faux concrete garden statuary potential that won't break the bank.
I've also used texture additive with paint to turn a glossy ceramic bust statue into faux concrete as well as a faux concrete paper mache bunny. But I've also used quick-set concrete to turn a ceramic hand into a faux concrete succulent planter.
For more budget-friendly outdoor water feature ideas see my Plant Pot Water Fountain, or Easy Solar Flower Pot Water Fountain posts. For an even larger water feature see my DIY Outdoor Privacy Water Wall feature.
Thanks for stopping by the Interior Frugalista today! I hope you were inspired by the DIY faux concrete bird bath replacement topper. If you have any questions, please leave them in the comment section below or the Contact Me tab at the top to drop me an email. I love hearing from you!
If you enjoyed this faux concrete tutorial, I'd be so thankful if you shared it with a friend and pinned it to your Faux Concrete Ideas or DIY Garden Decor board on Pinterest.

I share my projects at these inspiring link parties.








I think I like the replacement finial better than the little bird.
ReplyDeleteMe too Vanessa, even if it is faux concrete!
DeleteWow, you really did a great job.....And I think it looks amazing, very classic simple lines with lots of interest...super project, Marie!
ReplyDeleteThank you very much, Sandi 😊 I was so glad to finally do something with that resin finial after all these years! It's been raining steady here for weeks and so far it's holding up beautifully in the elements outdoors.
DeleteLove the height the finial adds. I think it might prefer it to the bird. And you are still the reigning queen of great faux finishes. Seriously...this looks just like concrete. I'd love to have this set....hint. hint. :-)
ReplyDeleteThank you Susie, I like the taller height of the finial too! At first I thought it looked way too tall but that's because I was used to that short little birdie for so long. Now I'm loving the height and that little birdie now sits on the ground in one of my flower gardens, cracks and all.
DeleteMarie - with all the painting involved that truly had to be a labor of love. Great project - terrific results.
ReplyDeleteSheila
Thanks Sheila! It was actually super quick, I think I was done painting start to finish in a couple of hours and most of that time was waiting for paint to dry. So glad was able to FINALLY put that finial to good use.
DeleteYour birdbath transformation is very impressive, Marie! You are the "Queen of Blending Colors" to match whatever you're working on! I love how it turned out! It looks fabulous in your garden!
ReplyDeleteYou know how to start a gal's day, Gail 🤗 Thank you so much! To be totally honest, I don't have a technique, I just play until I like what I see. I'm liking the topiary on top the bird bath much better than the concrete bird.
DeleteI love the work you've done with the finial, but I would have fixed the gorgeous birdies with some epoxy.
ReplyDeleteUnfortunately, the cracks are deep and beyond repair. I did, however, move the birdie into our flower bed and it looks cute among the blooms.
DeleteIt looks great, Marie! But I am sad about the broken birdie! No repair possible? He was so cute. I am glad to be reminded about the barrel stave plant hanger as I have barrel staves in my garage and had not remembered that I wanted to try making a plant hanger like you did. I hope I can remember until tomorrow when I can get out there and put them in an obvious place!
ReplyDeleteDon't be sad about the broken birdie, Naomi. The cracks are deep and beyond repair BUT he looks cute in my flower bed among the roses.
DeleteI would have never thought it is a faux one! You did a phenomenal job with it! I have to say I love the cracked birdie too - it has a character and looks vintage - something I am almost obsessed with!
ReplyDeleteThank you so much Maya! Yes, the cracked birdie does have lovely vintage charm and now happily sits in my rose garden where it looks perfect among the fragrant blooms.
DeleteThe birdbath looks fantastic. So much nicer than the original one.
ReplyDeleteThank you so much Debra! I think it looks much better too.
DeleteLove the faux concrete finial! It looks great!
ReplyDeleteThank you Sylvia! So glas to finally put the resin finial to good use.
DeleteMarie,
ReplyDeleteYou always come up with such creative ideas. Congrats, you are being featured at Over The Monn Linky party.
https://eclecticredbarn.blogspot.com/2019/07/over-moon-linky-party_21.html
Hugs,
Bev
Thank you so much Bev for your kind words and the feature! xo
DeleteHi Marie!
ReplyDeleteJust letting you know that you're one of this my features this week at Homestyle Gathering. I love this project and how it turned out! thanks so much for sharing at HG. It' a blessing to have you at the parties! I hope your week is off to a good start!
>>> Kim
Aw, thank you very much, Kim, for your sweet comment and feature! Hope you're having a good week as well. xo
DeleteMarie it looks so real. I found some paint the other day that is faux concrete with little sand in it to give you that scratched look that no one likes. Haha. Yours is much better.
ReplyDeleteThanks you, Mary 😄 Oh I know exactly what paint you are talking about, I've used it before. I was lucky that this finial (or whatever you call it) already had the texture so all I had to do was play with paint colors to match the bird bath. It's held up well through our brutal winter too!
ReplyDeleteis chalk paint toxic for animals? even though sealed, won't it leach out into the water? only asking cos i have a concrete gargoyle about 2feet tall, i painted with rustoleum chalk paint, i am going to let it "dry" for a couple of days - then seal. the water will be squirting out his mouth as he sits in a small manmade creek that feed a waterfall into our coy pond. i dont want to poison my fish or any other critters.
ReplyDeleteThe chalk paint I used is non-toxic, odour-free, with minimal volatile organic compounds (VOC). Not all chalk paint has the same VOC rating so if you are concerned, my suggestion is to visit the website of the chalk paint brand you plan on using and check their product information page. I hope this helps!
Delete