Mid-Century Modern Sewing Knitting Box Table Makeover
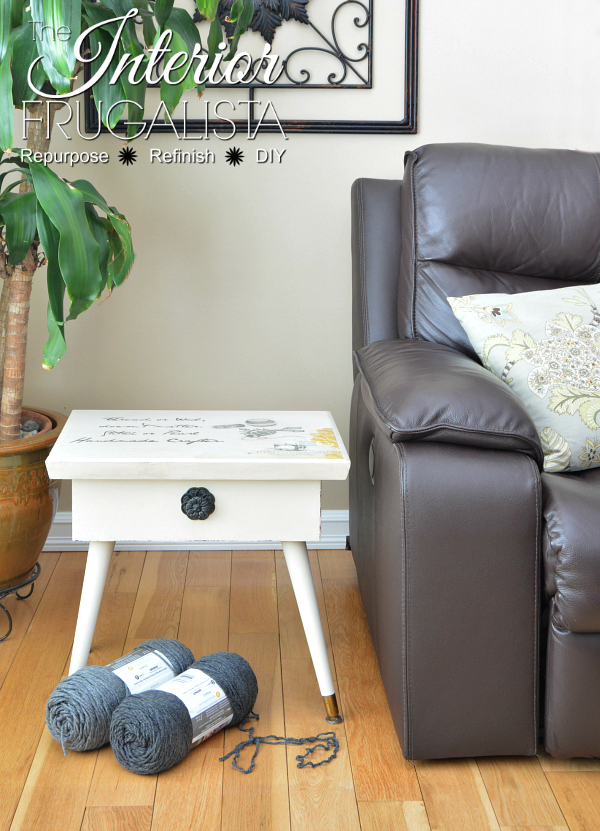
Several months ago Mr. Frugalista came home with an interesting little mid-century modern table with a hinged lid. The height being much lower than a standard side table, I had no idea what its intended purpose was so it sat collecting dust in the workshop.
Soon later I learned that it is a mid-century wood sewing or knitting box table and so I set out to give it a makeover with one-of-a-kind typography that only a needleworker would appreciate. This is the perfect little sewing/knitting storage table to have beside a favorite chair for those who love to sew, knit, crochet, or do needlework while watching television.
Mid-Century Modern Sewing Storage Table Makeover
If you come across a similar table or a mid-century modern sewing knitting box, they make the perfect gift for the needlework crafters in your life.
Here is the rather simple wooden table with your typical mid-century modern style tapered legs before the makeover.
This is the table with the hinged lid open. The interior is just a simple wooden box with no storage compartments or a locking mechanism to keep the lid open. I don't know if it is but it appears to be handmade.
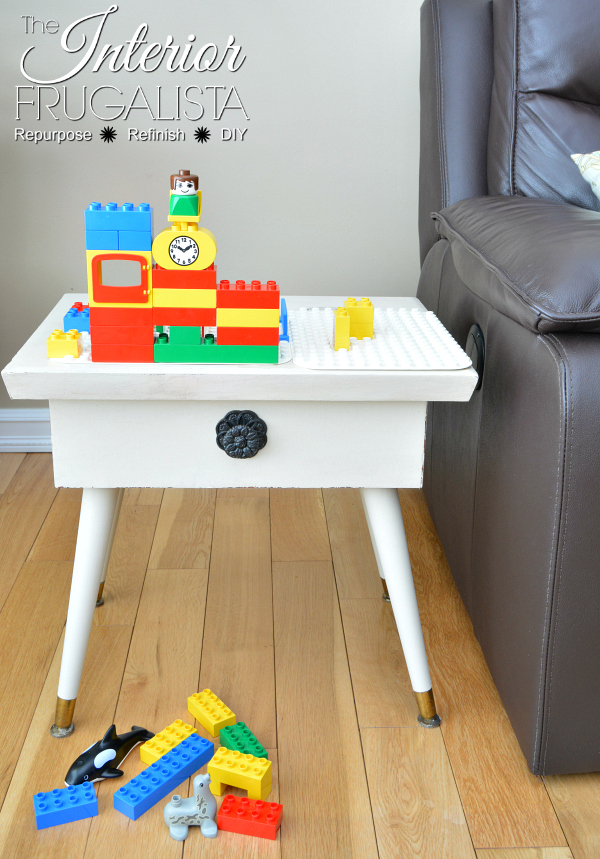
Initially, before knowing it was a sewing box table, I pondered turning it into a mega block play table for my grandson. So when he was over one day I did a trial run before starting the makeover.
Good thing I did because the first thing he did was climb on top. Once he figured out the top opened he had more fun opening and closing the lid than paying attention to what was stored inside.
Onto Plan B...
When I learned what the table was used for back in the day, there was no turning back.
I went in search of related graphics and typography to transfer onto the top of the painted table to make it a unique one-of-a-kind gift for someone. Further down in the post I share easy-to-follow instructions for how to do that.
This post contains affiliate links so you can see what products I used or recommend for this project. As an Amazon Associate, I earn a small commission from any qualifying purchases at no extra cost to you. Thank you for your support!
Sewing Knitting Box Table Makeover Instructions
The first I did is paint the entire table, inside and out, with two coats of mineral-based chalk paint by Dixie Belle Company Paint in the color drop cloth. After the paint dried, I lightly distressed the edges with 150-grit sandpaper to retain the vintage timeworn charm.
I thought it fitting to stencil grain sake stripes inside the painted storage box. It is so easy to add the stripe detail with this grain sack stencil and charcoal gray chalk-style paint.
I always line the inside of my furniture and had the perfect linen patchwork scrapbook paper in my stash. I simply set it in place so it can easily be removed down the road if one chose.
Locking Mechanism For The Lid
One thing that was missing was a lock mechanism on the hinged lid. Who has the patience to open the lid every time they need something while doing needlework?
Plus if you have little ones around, it's a safety hazard so we installed this curved locking lid support mechanism so the lid stays open when you need it to.
Adding Decorative Hardware
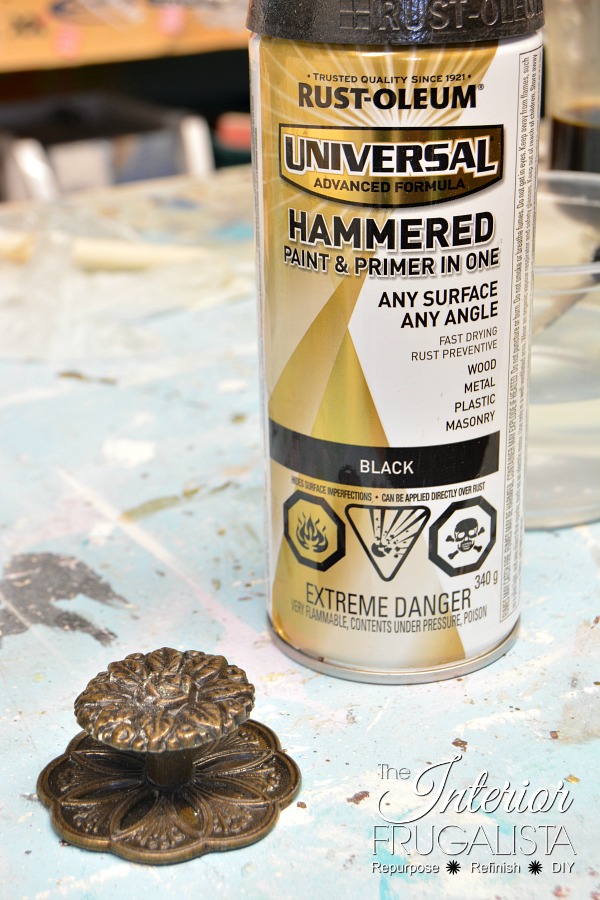
The front of the table was looking rather bland and I had this rose furniture knob with a backplate in my stash. Instead of the antique gold finish, I changed the color with black hammered metal spray paint.
I like the contrast against the white and how it echoes the dark gray grain sack stripes when the lid is open.
Next, I added the typography and graphics onto the tabletop using an image transfer technique and decoupage.
Decoupage Graphic On Tabletop
I found a sweet vintage sewing machine graphic on a sheet of scrapbook paper that I had on hand. I cut out the area that I liked and used Mod Podge to decoupage it on the bottom corner of the tabletop.
To do that you simply brush a liberal amount of Mod Podge on the back of the paper and set it in place. Then put your hand inside a plastic freezer bag and rub your fingers firmly for good contact with the wood and to smooth out any wrinkles.
Adding Typography On Tabletop
In PicMonkey I created a verse and reversed the text so it prints in a mirror image. Then I used this glossy paper image transfer technique, an inkjet printer, and the back of a spoon to apply the typography onto the painted wood tabletop.
Next, I went over to the Graphics Fairy website and found a Retro Sewing Pin Cushion and Vintage Sewing and Thread Spool graphics.
I also printed them in a mirror image with an inkjet printer and applied them to the top of the table using the same image transfer technique.
Clear Protective Top Coat
When using an inkjet printer to transfer graphics or typography onto painted wood, you should wait for at least 24-hours for the ink to completely dry before applying a topcoat.
A Word Of Caution
I encountered a surprising issue when applying the topcoat to my painted knitting box table. I waited for 48-hours for the ink to dry but to my surprise, the ink started to smear. This has never happened to me before and I was baffled.
The only difference is that I painted the table with mineral-based chalk paint. In the past, I've always used traditional chalk paint which is porous and allows the ink to penetrate into the paint.
Mineral-based paint, however, has an acrylic resin base which makes it water-resistant, therefore not allowing the ink to absorb.
So I have three suggestions if you plan on transferring graphics onto the wood that has been painted with a mineral-based paint like I did:
- After waiting the suggested 24-hours for the inkjet printer ink to completely dry, instead of brushing a clear coat, spray a light coat of clear spray paint instead.
- Or use this image transfer technique to add the graphics instead.
- Or paint the wood with porous traditional chalk paint or milk paint first.
How I Fixed The Smeared Ink
I managed to redeem the smeared graphics on the sewing box table by carefully recreating as much of the smeared details as I could with a script liner art brush and the same Rocky Mountain charcoal gray chalk paint color that I used on the stenciled grain sack stripes.
Once the paint dried, I sprayed a light coat of clear spray paint over the transferred graphics. Then once the clear coat dried I was able to successfully brush two coats of Dixie Belle Paint Company Gator Hide, a matte water-resistant protective finish.
How To Age The Graphics
Wanting to retain the vintage charm of this mid-century modern table, I applied dark wax over the clear coat once it was dry. Then I wiped away the excess dark wax with a lint-free shop towel. It gave the graphics and decoupage scrapbook paper an aged patina.
I should put out that you should apply the dark wax ONLY after you've applied a clear topcoat. Otherwise, you risk staining the decoupage scrapbook paper and painted wood.
That's it, what do you think of the makeover?
Thanks for stopping by the Interior Frugalista today! I hope you were inspired by this vintage wood sewing knitting box table makeover.
If you have any questions, please leave them in the comment section below or the Contact Me tab at the top to drop me an email. I love hearing from you!
If you enjoyed this mid-century modern sewing storage table, I'd be so thankful if you shared it with a friend and pinned it to your favorite board on Pinterest.


Comments
Post a Comment
Don't be shy, I love reading your comments and reply to every single one! If you want to be notified when I reply back to you, click the "Notify Me" button below the comment box.