Antique Chair Spindle Wooden Garden Tool Caddy
It all started with a bucket of old spindles and an itch to get to the bottom of the stash. I didn't reinvent the wheel with this wood project because you'll find many on Pinterest. But what makes these DIY wooden garden tool caddies unique is the antique chair spindle handles.
I couldn't just stop at one and ended up making four tool caddies in different colors to sell at an upcoming market. But when I was finished, I loved them so much that I kept one for myself.
DIY French Country Style Wooden Garden Caddy
It's time for another Power Tool Challenge and the theme this month is Summer. For our challenge in March, I repurposed an Antique Pressed Back Chair Bird Feeder and I figured I'd run with the repurposed antique chair parts again for this month's challenge.
If you haven't heard of the Power Tool Challenge, it is a monthly series where several female DIY bloggers come together to share a project made with a power tool(s). The goal is to inspire, motivate, and empower our female readers to step out of their comfort zone and try one of our projects using power tools.
This post contains affiliate links so you can see what products I used or recommend for this project. As an Amazon Associate, I earn a small commission from qualifying purchases at no extra cost to you.
Let's Talk Safety
Before we get into the details on how to make these tool caddies, let's talk about safety.

Be sure to wear protective eyewear, ear protection, and read your power tool operating manual and safety guide.
What You'll Need To Build It
Power Tool List
Supply List
- Chair Spindles
- 8' Pine Fence Boards
- 1 1/4" Brad Nails
- 1/2" Forstner Drill Bit or Hole Saw Bit
- 80 grit mouse sander pads
- Construction Glue
- Wood Aging Solution (homemade recipe provided)
- Chalk Type Paint
- Inkjet Printer
- Printable Graphic
- Glossy Paper
Tool Caddy Measurements
- Side Pieces: 5 1/2" x 14"
- Front & Back Pieces: 5 1/2" x 15"
- Bottom Piece: 5 1/2" x 13 1/2"
Before we get into the nitty-gritty of how to make the wooden tool caddy, almost all of the DIY projects shared here at Interior Frugalista have step-by-step tutorials so why not get your budget DIY on and subscribe. You can also follow us on Pinterest, Facebook, Instagram, and YouTube.
How To Build A Wooden Tool Caddy With A Chair Spindle Handle
Trim Chair Spindle Handles
Use a miter saw to cut each end of the antique chair spindles so they are 15-inches long.
Cut Tool Caddy Pieces
Each wooden caddy is a one-board project using an 8-foot pine fence board.
Cut two pieces 14-inches long and another two 13 1/2-inches long. We'll address the angled cuts in the next step.
Angle Cuts On Side Pieces
To cut the angle pieces there are a few different power saws that you can use. Pick the one you feel most comfortable with or have readily available.
I used a jigsaw but it's not the most precise cut. My preference would be a sliding compound miter saw (on my wish list). You could also use a scroll saw, band saw, or table saw.
- Mark the center of the top of each side piece.
- Measure 3/4" on each side of the center mark - making the top measurement 1 1/2" wide.
- From the bottom measure up 5 1/2 inches on both sides. This equals the height of both the front and back pieces.
- With a straight edge, draw the angle on both sides of each mark (pictured above).
- Clamp the board securely on your work surface and cut the angles.
Drill Spindle Handle Holes
For this step, you'll need either a hole saw drill bit or a Forstner drill bit like I used.
- Find the center at the top of each side piece.
- Measure and mark 1 1/4-inches down from the top.
- Using a 1/2-inch Forstner Drill Bit (like pictured above) or hole saw bit, place the tip of the bit on the mark you just created.
- Drill the hole for the spindle handles.
Pro-Tip
For a nice clean cut on both sides of the board, drill until just the tip of the drill bit is poking through the other side. STOP, flip the board over, and drill from the opposite side until you've drilled all the way through.
Wooden Caddy Assembly
My apologies for the blurry picture. You may notice in the photo below that I'm nailing a plywood front, rather than the pine board we cut in a previous step. I completely forgot to take a photo of this step so I used a photo from the wedding card caddy that I made for my daughter's wedding as a reference.
- Apply construction glue to the base of one side piece and nail it onto the bottom piece with a brad nailer and 1 1/4-inch brad nails.
- Apply construction glue to the inside of the hole for the handle.
- Insert the chair spindle into the hole.
- Apply construction glue to the inside of the hole on the second side piece.
- Feed the chair spindle through and nail the side piece to the bottom piece of the caddy.
- Nail the front to the base and the side pieces together, ensuring everything is lined up nice and straight.
- Repeat for the back piece.
That's it, your handmade wooden caddy is assembled! Now onto the fun part, painting and adding vintage French country charm.
Make The New Wood Look Old
Now we're going to age the new pine boards on our garden tool caddy with stuff found in the kitchen.
You can find the aging solution recipe and detailed instructions in my How To Age New Wood tutorial.
Whitewash Paint Technique
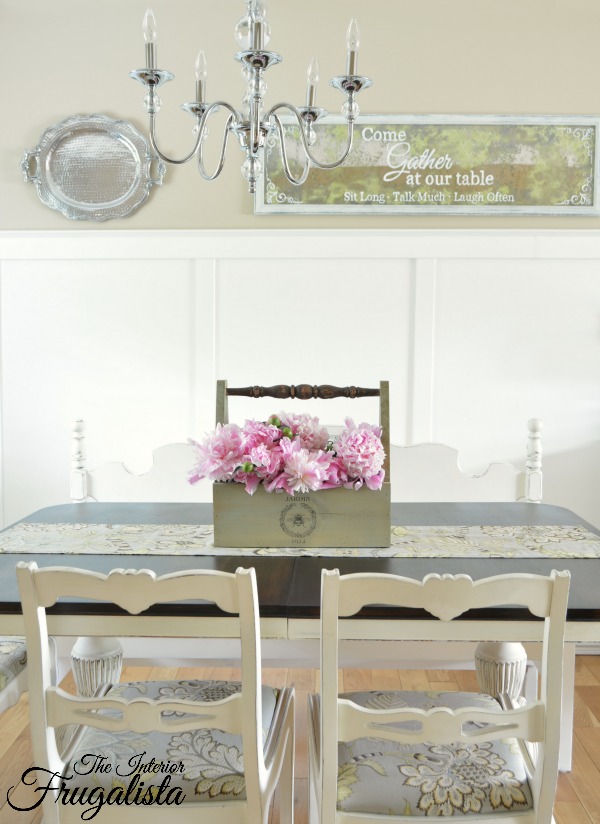
I painted each garden caddy a different color but the one I'm focusing on in this post is painted in the color Sage Advice by Country Chic Paint. The colors of the other caddies are Simplicity White(a cool white), Vanilla Frosting(a warm white), and Elegance(a soft blue) also from Country Chic Paint.
For a whitewash paint finish, you simply dip just the tips of your paintbrush into a bucket of water first and then into the jar of paint to dilute it. With light pressure, brush long brush strokes over the aged wood.
It gives a semi-transparent wash so the wood underneath shows through. With a lint-free rag, wipe back some of the excess paint so more of the natural wood peeks through (like pictured above).
French Graphic Transfer On Wood
All the graphics on the chair spindle caddies were found on the Graphics Fairy website like the sweet French Jardin 1914 graphic transferred on the sage green garden tote.
You'll find detailed instructions for how to transfer graphics onto the wood in my Glossy Paper Image Transfer Technique tutorial.
Protective Finish
After the ink has completely dried on the image transfer (overnight), brush clear wax with a lint-free rag to protect the finish. The wax will deepen the paint color and the graphic.
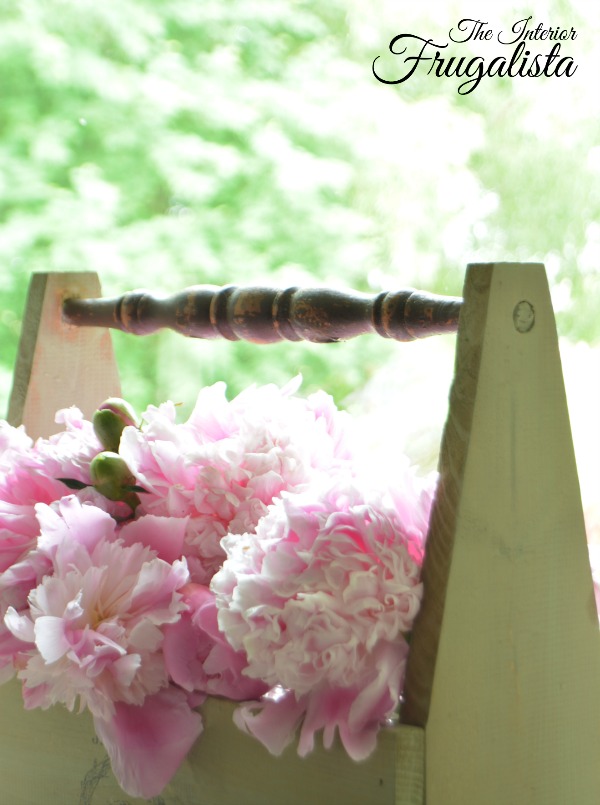
The peonies in our garden are in full bloom and I couldn't resist filling the garden caddy I kept for myself with fresh-cut pink peonies.
Thanks for stopping by the Interior Frugalista today! I hope you were inspired by this French Country Garden Caddy with a chair spindle handle. If you have any questions, please leave them in the comment section below or the Contact Me tab at the top to drop me an email. I love hearing from you!
If you enjoyed this DIY Wooden Tool Caddy idea, I'd be so thankful if you shared it with a friend and pinned it to your DIY Wood Crafts or Wooden Caddy Ideas board on Pinterest.

Click on the links below to see what the talented ladies on our Power Tool Challenge team made for their summer-themed projects.
Frozen Treat Stand | My Love To Create
Red White And Blue Cornhole Game | Create And Babble
Drying Rack From Old Crib rail | The Kim Six Fix
Chair Spindle Wooden Garden Caddy | Interior Frugalista (me)
Star Clothes Drying Rack | A Piece Of Rainbow
Farmhouse Bench Building Plans | Refresh Restyle
Vegetable Gathering Basket | Designs By Studio C
DIY Standing Towel Rack Tutorial | H2O Bungalow
Reclaimed Wood Bookcase | Confessions of A Serial DIYer
DIY Footstool | Virginia Sweet Pea
DIY Hose Hanger | My Repurposed Life
I share my projects at these inspiring link parties.


I absolutely love how you have repurposed these old chair spindles Marie! And the graphic you added is perfect, along with adding the mason jars filled with beautiful peonies!
ReplyDeleteThank you so much, Sam. Our friend, Leanna has one of these and I kept one for myself. They were such fun to make.
Delete